

Thank you for using our WooCommerce Delivery Time Slots plugin. In the following sections we will show you how to set up, and as well as use the plugin the easiest way possible.
Installation
After download, the .zip package, unzip it, and then you will see a folder woocommerce-delivery-time-slots.
Go to Dashboard → Plugins → Add New, and then click Upload Plugin.
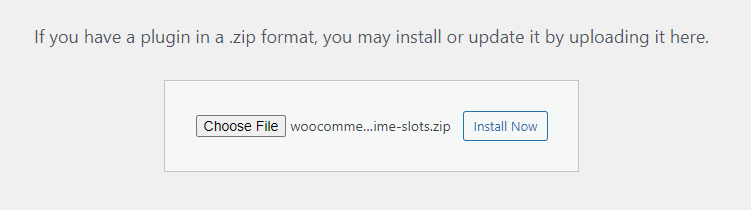
WooCommerce Delivery Time Slots – Admin Screenshot
Select the woocommerce-delivery-time-slots.zip file, and then click Active Plugin.
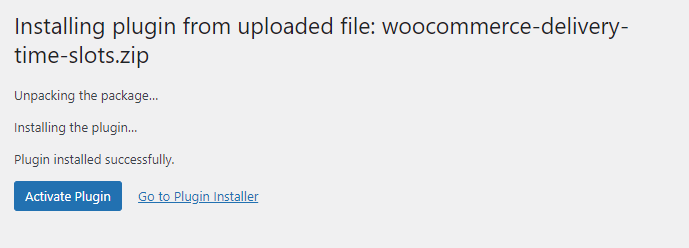
WooCommerce Delivery Time Slots – Admin Screenshot
After uploading the plugin, then click Activate Now link to activate the plugin.
How to activate your license key
Our pro plugin come with a license key, a license which you will find in your accounts ProWC Plugins / Envato plugins purchase history.
To activate the license key for your plugin, follow these steps:
1. The Purchase key field can be found in Dashboard → WDTS Settings tab.
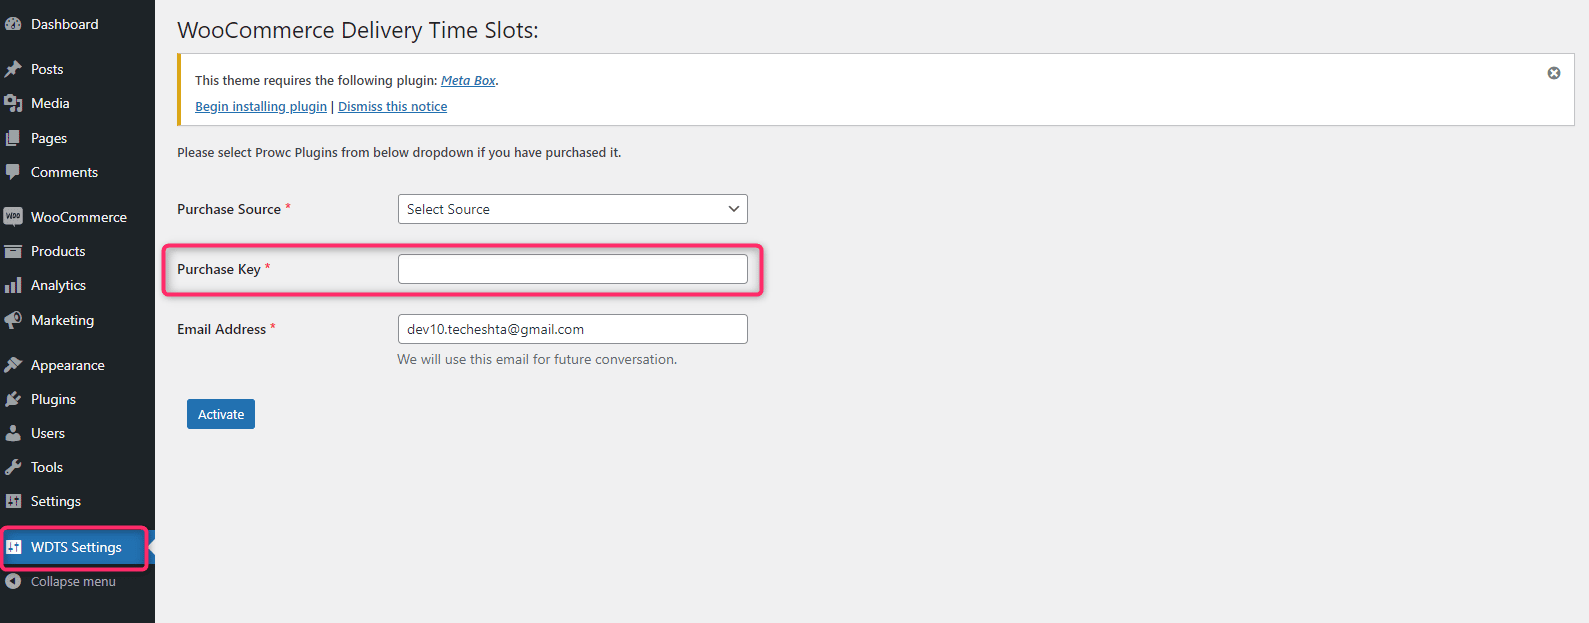
WooCommerce Delivery Time Slots – WDTS Settings
2. Keep your license key handy and filled the form.
- Purchase Source : Select your purchase source where you have purchase the plugin.
- Purchase Key: Insert the purchase key into the field.
- Email Address: Insert your email address.
Click Activate.
3. To make sure that your license key is properly activated, check Activate button text will be changed to Deactivate.
Important
When you first activated the plugin, there’s a notification asking for installing the Meta Box plugin. It’s required to install Meta Box to access the plugin settings page. If you dismissed it, then please go to Plugins → Add New and search for “meta box”, then install and as well as activate it.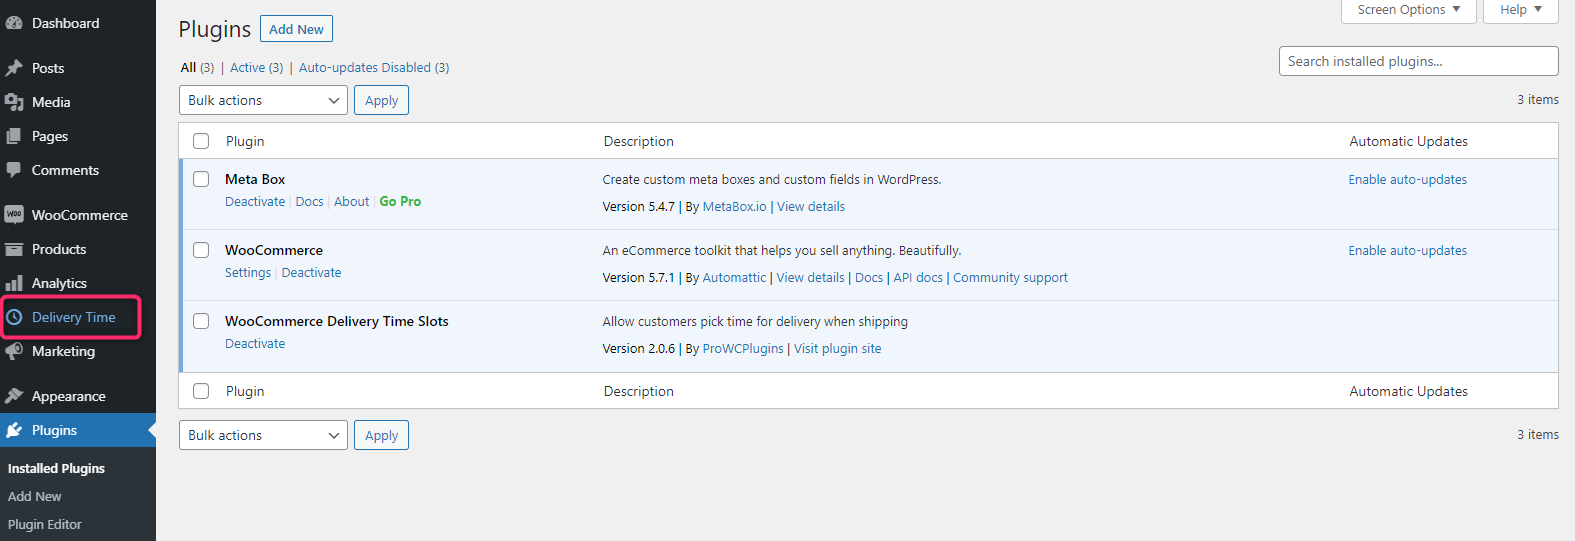
WooCommerce Delivery Time Slots – Admin Settings
After that, you’ll see the plugin settings page Delivery Time in the main admin menu as shown below screenshot.
Upgrade
If you have an old version of the plugin, please follow the steps below to update it to the latest version:
- Download the .zip package, unzip it and you will see a folder “woocommerce-delivery-time-slots”.
- Unzip the “woocommerce-delivery-time-slots” to get “woocommerce-delivery-time-slots” folder.
- Upload “woocommerce-delivery-time-slots” folder to the /wp-content/plugins/ directory, overwrite old plugin files.
Configuration
All the plugin settings are available in the Delivery Time menu in the main admin menu.
As you can see there are five settings tab namely: General, Date, Time, Language, and as well as Appearance. Below are descriptions of all the settings:
The first tab is General.
General
In Below screenshot is for General settings.
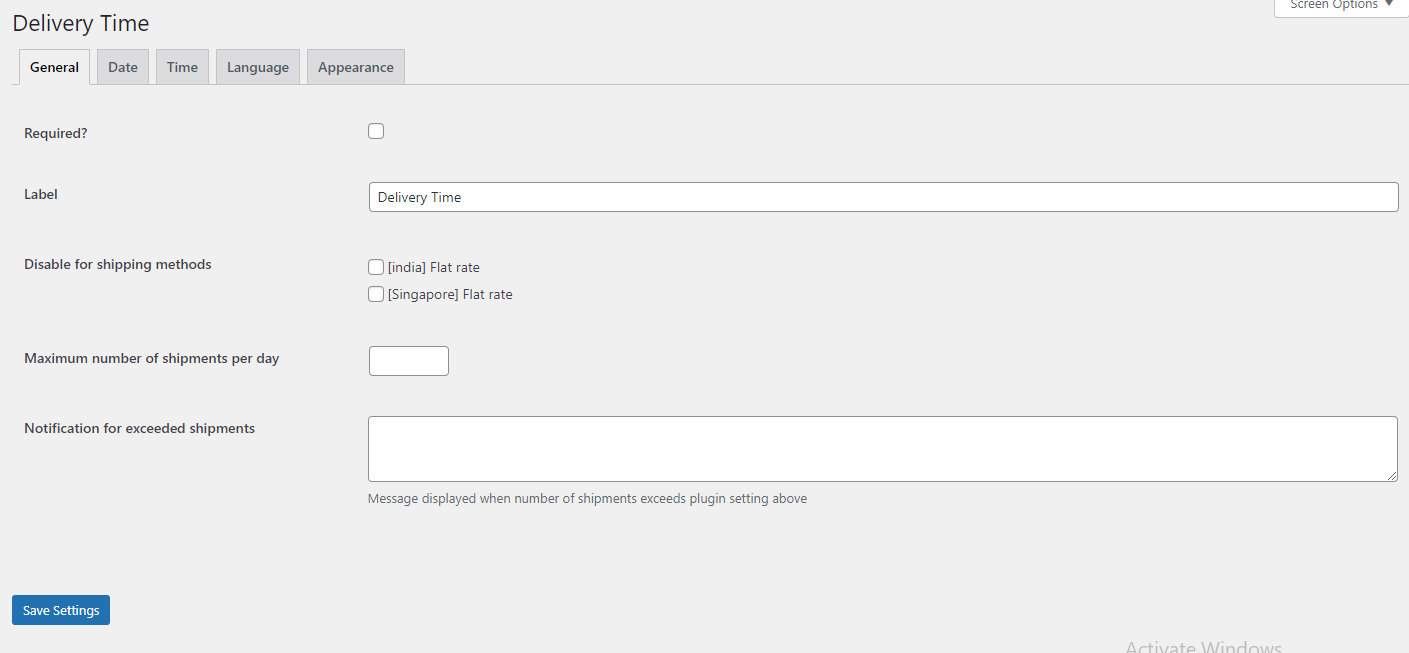
WooCommerce Delivery Time Slots – Admin Settings
Required
This option makes the delivery time a mandatory field. Customers must enter the delivery time to make the order. It is a checkbox and it is unchecked by default.
Label
This is the text label that appeared above the input on the checkout page. By default, it is Delivery Time, but you can change it to anything.
On the checkout page, also you can see the pointed label (Delivery Time) as shown below screenshot.
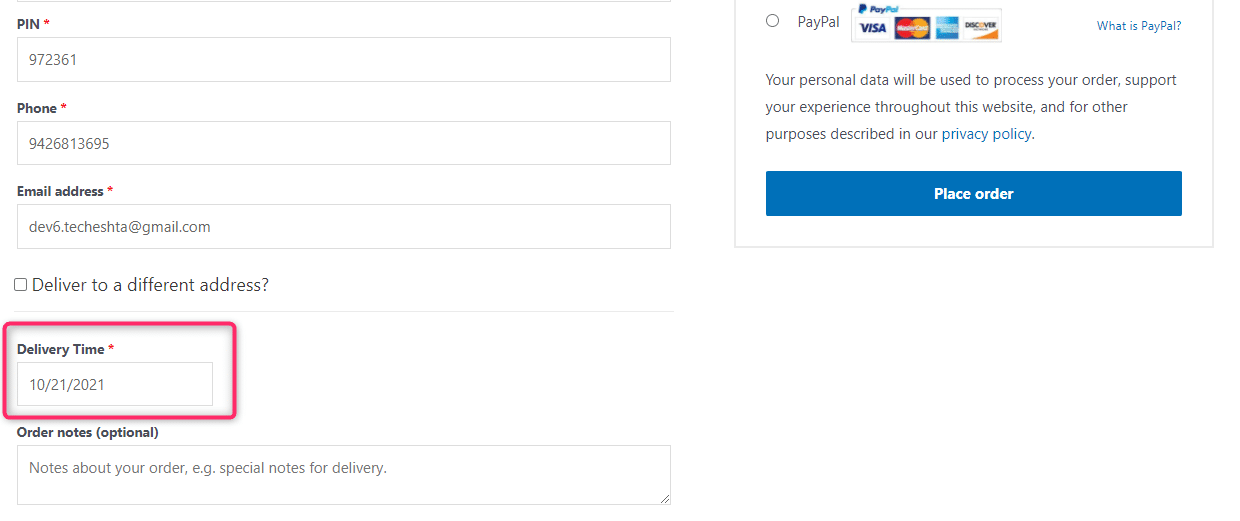
Front-end checkout page
Disable for shipping methods
This option allows you to disable the date, time picker for specific shipping methods. Note that, the field is still shown in the checkout page, but when people select a shipping method which is marked as disabled in this option, the input does not show date, time picker for them to select.
Maximum number of shipments per day
Some stores offer a limited number of shipments per day, due to their limited resources. This option can help you to do this.
This option allows you to enter the maximum number of shipments per day that your store can support.
Notification for exceeded shipments
This option is the notification message that customers can see when the number of shipments for a specific day exceeds the limit set by the store.
The second tab is the Date.
Date
The below screenshot is for Date settings.
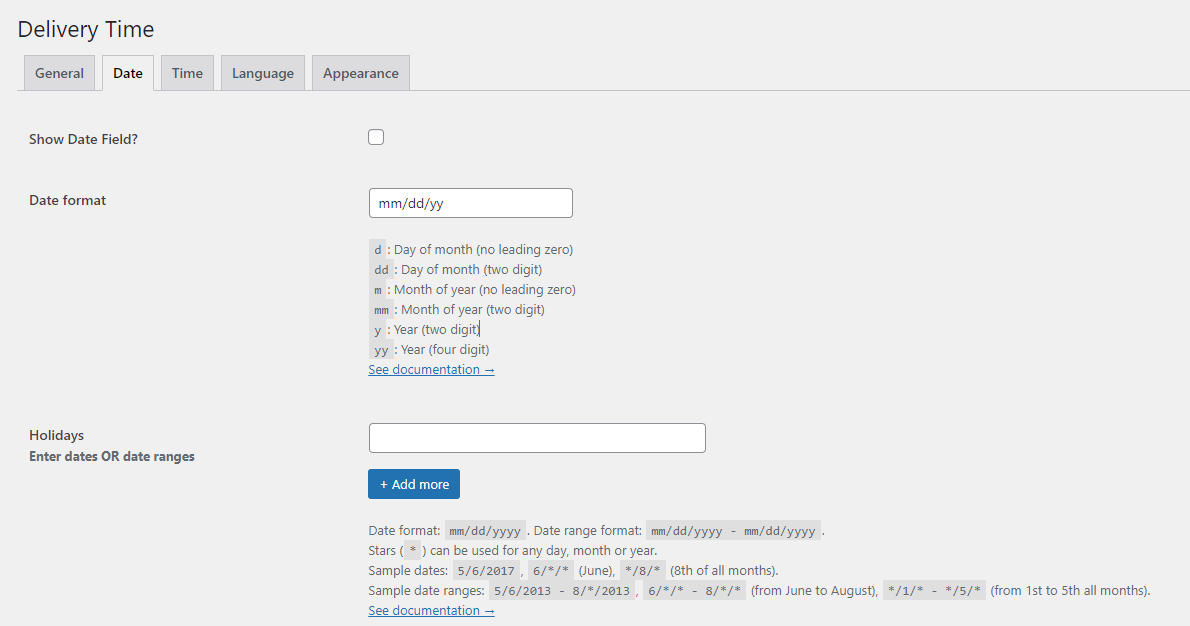
WooCommerce Delivery Time Slots – Admin Settings
Show date
Check this checkbox to allow customers to pick the date for delivery on the checkout page.
It is a field that when clicked opens a calendar on the checkout page.
Default: Unchecked
Date format
Format a date into a string value with a specified format. The format can be combinations of the following:
d– A Day of month (with no leading zero)dd– A Day of month (two-digit)o– In the Day of the year (with no leading zeros)oo– In the Day of the year (three-digit)D– Day name shortDD– Day name shortm– The month of the year (with no leading zero)mm– The month of the year (two-digit)M– Month name shortMM– Month name longy– Year (two-digit)yy– Year (four-digit)@– Unix timestamp (ms since 01/01/1970)!– Windows ticks (100ns since 01/01/0001)'...'– Literal text''– Single quote- Anything else – Literal text
There are also a number of predefined standard date formats available:
ATOM:yy-mm-dd(Same as RFC 3339/ISO 8601)COOKIE:D, dd M yyISO_8601:yy-mm-ddRFC_822:D, d M y(RFC 822)RFC_850:DD, dd-M-y(RFC 850)RFC_1036:D, d M y(Display RFC 1036)RFC_1123:D, d M yy(See RFC 1123)RFC_2822:D, d M yy(See RFC 2822)RSS:D, d M y(Same as RFC 822)TICKS:!TIMESTAMP:@W3C:yy-mm-dd(The same as ISO 8601)
Default :
mm/dd/yy
On the checkout page, you can see the delivery date picker is available as shown below screenshot.
WooCommerce Delivery Time Slots – Admin Settings
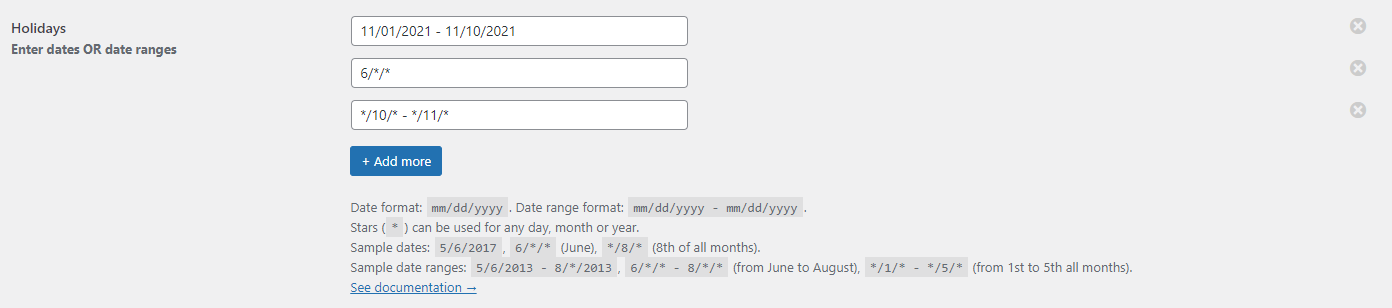
Holidays (Enter dates OR date ranges)
This is the most powerful weapon the plugin supports. With this feature, you’re able to provide shipping to customers in only some certain days/months.
In holidays (like Easter holidays, Black Friday, Christmas, etc…) obviously you are not able to provide delivery to the customers. So you can restrict the customers to choose out those dates by disabling them. You can say Restrict Dates as well.
In order to do above all, you need to do is enter your rules into the textbox.
Simply, you have to follow this guide:
- You can enter only one rule per line.
- Each rule must be a single date or a single date range.
- Date must be formatted in US date format, e.g.
mm/dd/yyyy. - Date range must be formatted e.g.
mm/dd/yyyy - mm/dd/yyyy(e.g.fromDate - toDate). - You can use stars (*) for a day, month, or year, which means any day, any month, or as well as any year.
Examples:
1. Single date
| Format | Meaning |
|---|---|
5/12/2013 |
No shipping on May 12th, 2013 |
1/1/* |
No shipping on January 1st of any year (New Year Day) |
8/*/2013 |
For shipping is not allowed in August 2013 |
*/1/2014 |
Shipping is not allowed on the first day of any month of 2014 |
12/*/* |
Shipping is not allowed in December of any year |
*/1/* |
The shipping on the first day of any month of any year |
*/*/2013 |
The Shipping is not allowed in 2013 at all |
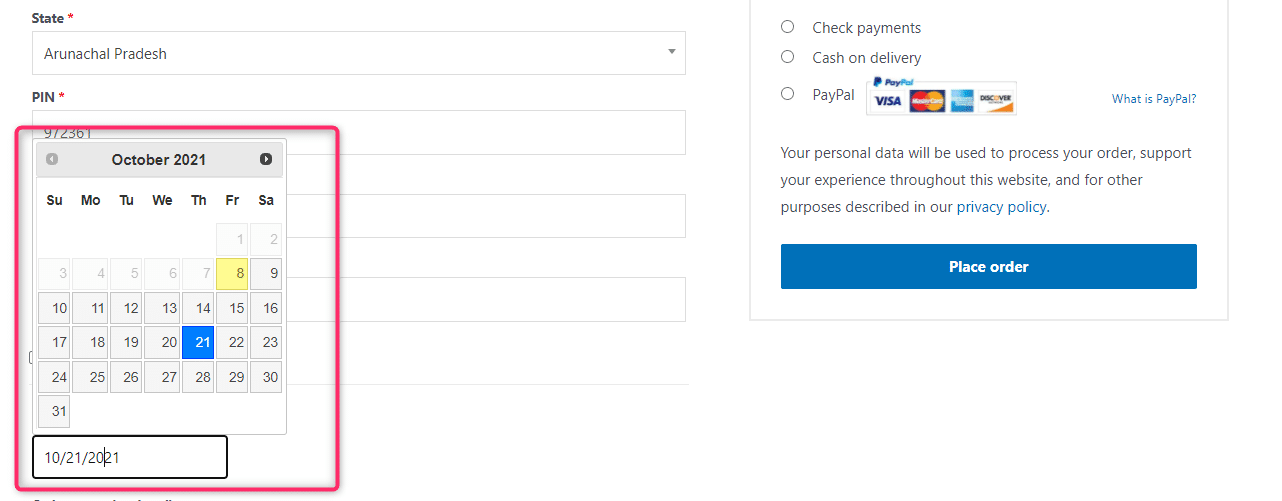
I have input the date string: 10/*/202110/*/2021. This date string would disable the whole October month in the date picker.
Here, you can see the following output:
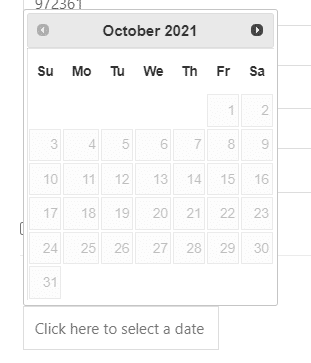
Front-end checkout Page
2. Date range
The date range is just a combination of from date and to date. Each date in the range must be well-formatted as a single date.
| Format | Meaning |
|---|---|
5/12/2013 - 6/1/2013 |
No shipping from May 12th, 2013 to June 1st, 2013 |
12/24/* - 1/1/* |
No shipping from December 24th to January 1st of next year |
6/*/* - 8/*/* |
The shipping is not allowed from June to October of any year |
*/1/* - */5/* |
The shipping on the first 5 days of any month of any year |
8/*/* - 12/1/* |
To shipping from August to December 1st of any year |
1/15/* - 2/*/* |
To shipping is not allowed from January 15th to February |
*/25/* - */1/* |
Here, no shipping from 25th to 1st day of next month |
I have input the date string: 11/01/2021 - 11/10/2021.This data string would disable dates from November 1st, 2021 to November 10th, 2021 in the date picker.
You can see the following output:
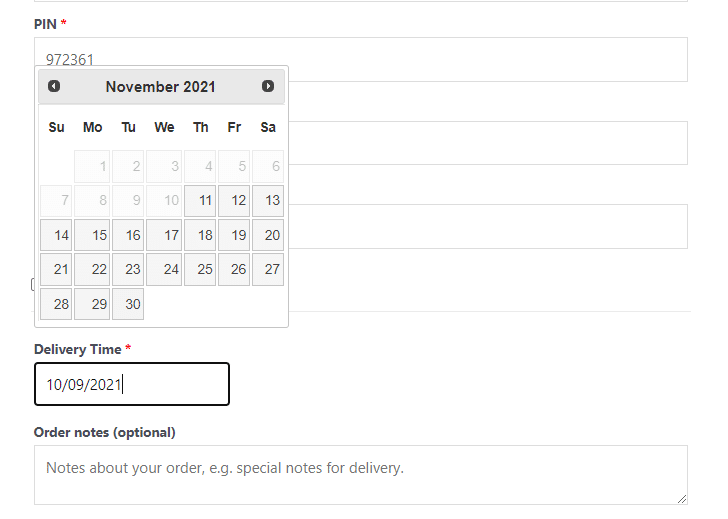
Front-end Checkout Page
In both the examples you can also disable more dates by clicking + Add more button and entering only one date string.
Move ahead in the Date tab you can see more options in below screenshot:
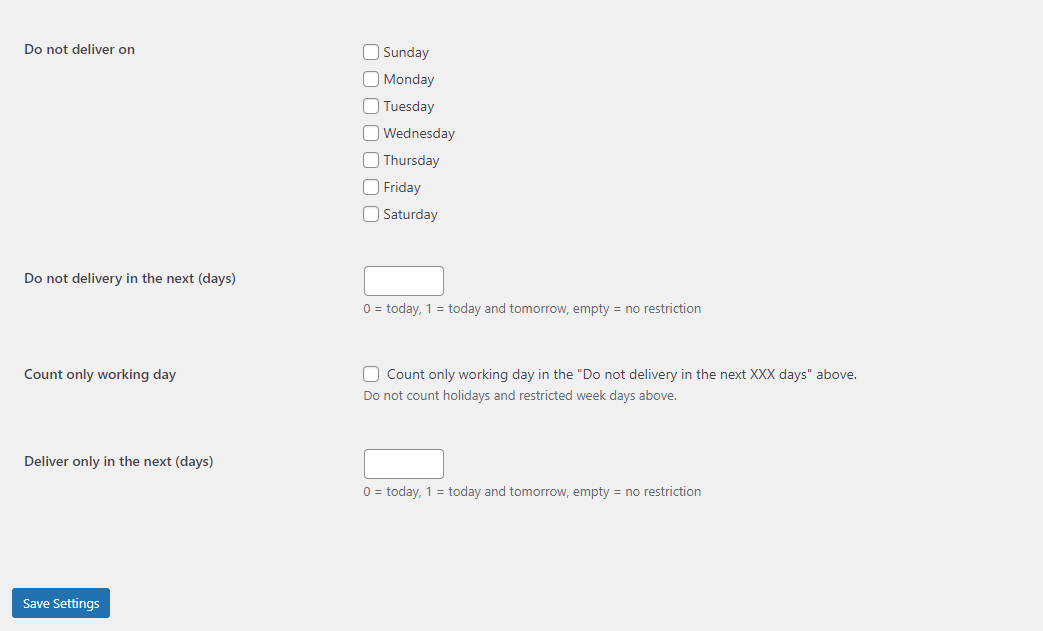
WooCommerce Delivery Time Slots – Admin Settings
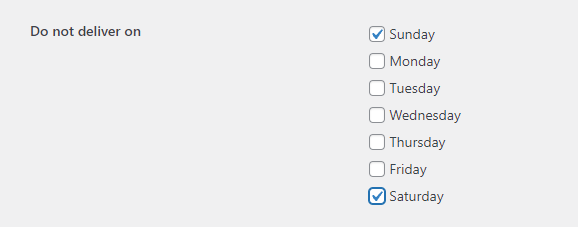
Do not deliver on
In this option, you can disable dates using day names. Just select which days you do not want to provide shipping from the checkbox list and save. It’s called Restrict by weekdays too. Here we will check Saturday and Sunday.
You can see in the screenshot Saturday and as well as Sunday are disabled. You can’t select Saturday and Sunday of any month of any year.
WooCommerce Delivery Time Slots – Admin Settings
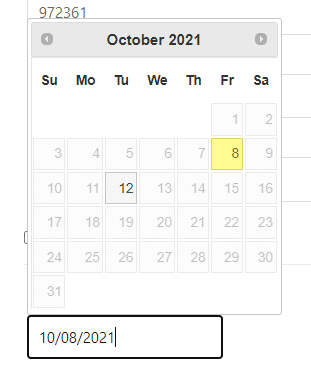
Do not delivery in the next (days)
You can disable date picker for some days, and as well as counting from today.
For e.g.
0: Disable today1: Disable today and tomorrow
If you do not enter any value, the plugin will disable all past days excepting today.
Here we would enter 4 into that textbox and it will disable 5 days in the date picker. Because the index starts at 0.
In the screenshot marked 5 days are disabled. Today is 08 October 2021.

WooCommerce Delivery Time Slots – Admin Settings
Count only working day
Count only working day in the “Do not delivery in the next (days)” above.
Do not count holidays, and as well as restricted weekdays above.
Deliver only in the next (days)
Similar to the “Do not delivery in the next (days)” above, also you can enable date picker for only some days, counting from today.
For e.g.
0: Enable today1: Enable today and tomorrow
If you do not enter any value, the plugin will enable all days.
Here we would enter 4 into that textbox and it will enable 5 days in the date picker. Because the index starts at 0.
In the screenshot marked 5 days are enabled. Today is 08 October 2021.
Front-end checkout Page
The third tab is the Time.
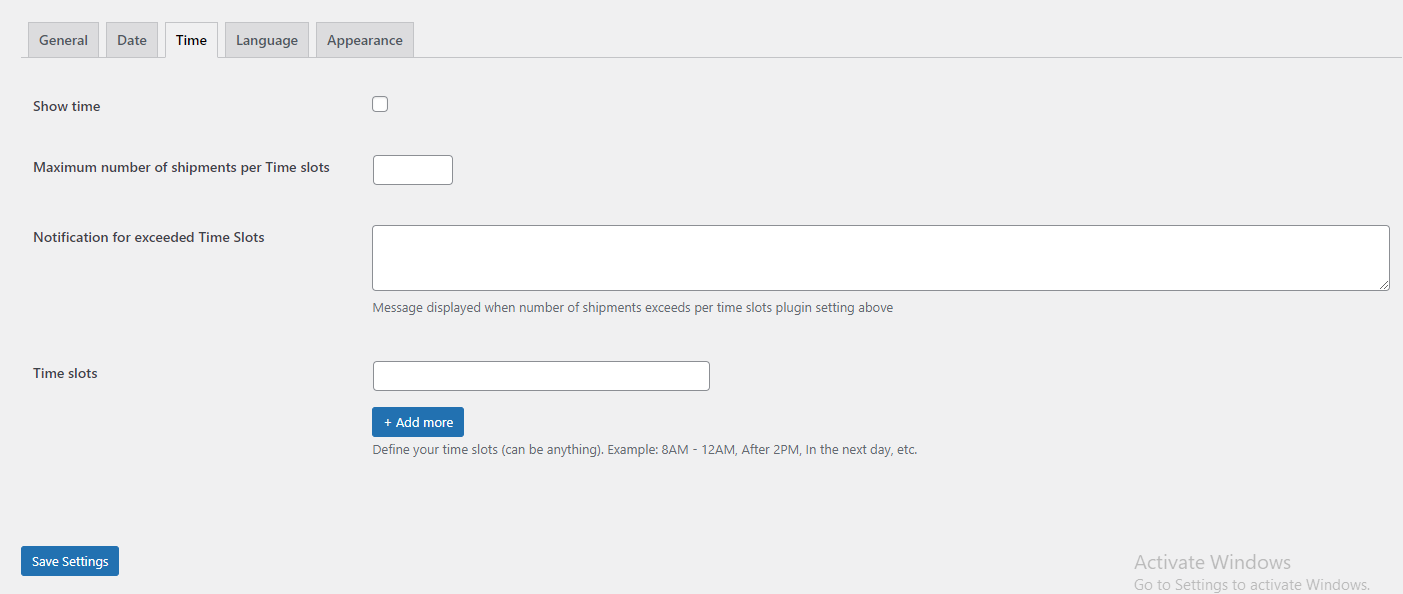
Time
The below screenshot is for Time settings.
WooCommerce Delivery Time Slots – Admin Settings
Show time
Check this checkbox to allow customers to pick the time for delivery on the checkout page.
It is a dropdown list just below the Delivery Time box on the checkout page.
Default: Unchecked
You can see the time option in the below screenshot by checking that checkbox.
Time slots
Time slots are the time you can deliver goods to the customer. It can be a time range (from 2 PM to 3 PM), or arbitrary time (this afternoon, tomorrow morning).
This option allows you to define any kind of time slots for delivery by simply entering your text in the input box. Also, you can add as many as you want time slots by clicking + Add more button.
For example:

WooCommerce Delivery Time Slots – Admin Settings
- 8 AM – 12 AM
- 2 PM – 4 PM
or
- In the afternoon, after 5 PM
- In the next day
The fourth tab is the Language.

Front-end Checkout Page
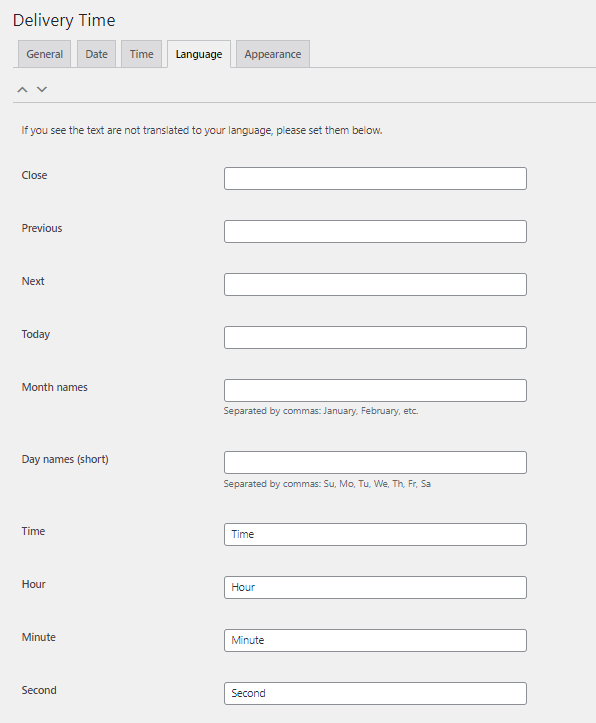
Language
The below screenshot is for Language settings.
WooCommerce Delivery Time Slots – Admin Settings
The plugin supports most languages in the world. You just need to select them from the dropdown box on the WordPress Admin → Settings → General page. Also, change the site Language you want to change. With the selected language, all text in the date time picker will be translated, such as text for prev, next, today, and as well as, etc.
If you see the text are not translated to your language you can also set custom text for today, month names, day names, and as well as, etc. Just in case the auto-translation is not as good as expected.
We have change site language from English to French.
Product Time Countdown for WooCommerce – Admin Screenshot
As shown in the above screenshot we have set the custom text for the Hour in the date picker. Output is:
The fifth and last tab is Appearance.
Appearance
The below screenshot is for Appearance settings.
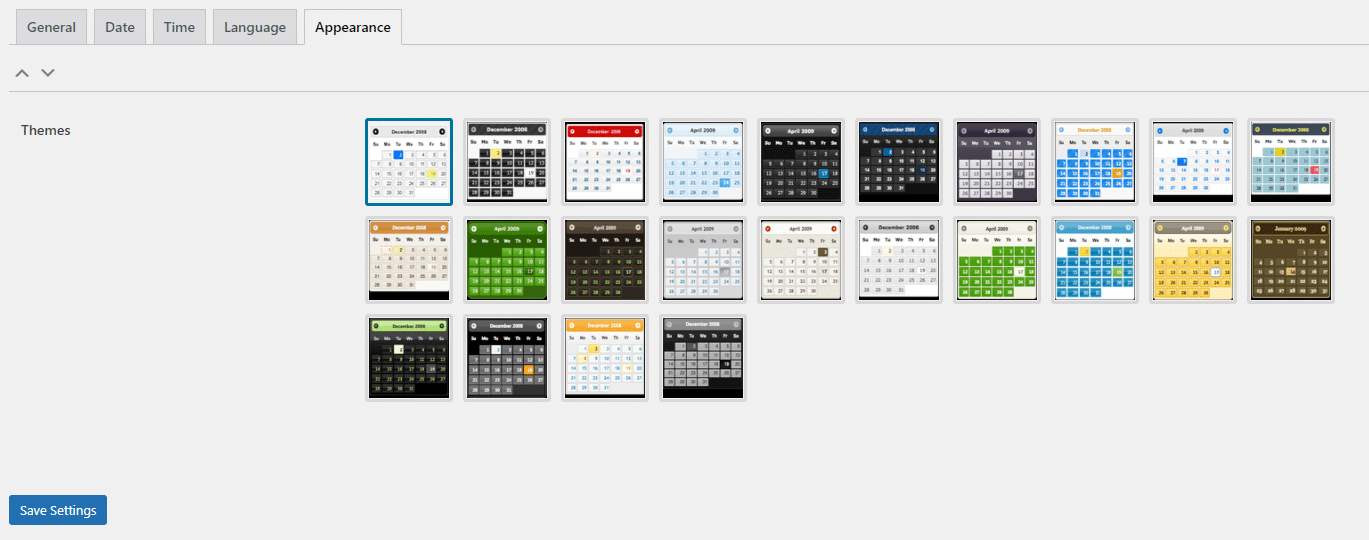
WooCommerce Delivery Time Slots – Admin Settings
Themes
Here, you can choose any theme from 24 available themes. Also, it’s helpful when you want the calendar matches to your website color.
For Example We have selected the 2nd-row 2nd column theme. The output is below:
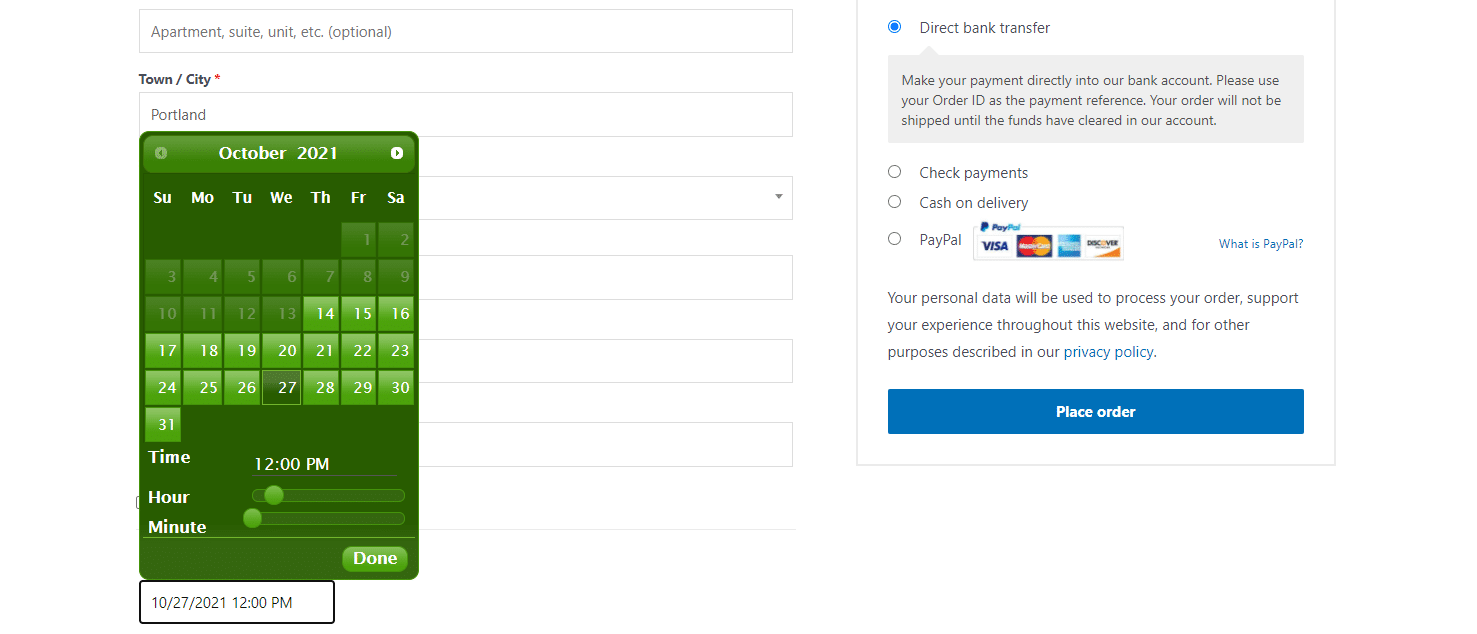
WooCommerce Delivery Time Slots – Admin Settings
Note: Don’t forget to click the Save Settings button to save your changes.
Shortcodes
Showing input for entering shipping time
In default the plugin shows the input for entering shipping time on the Checkout page, but you might want to display it on other pages as well.
To do that, you can use the shortcode [wdts_field]. This shortcode does not have any attributes. So, use the code follow to insert the shortcode to your page template:
<?php echo do_shortcode('[wds_field]'); ?>
Showing picked shipping time
To show picked shipping time of an order, then please use the shortcode [wdts_shipping_time id="ORDER_ID"]. This shortcode requires an order ID (please replace it with yours).
To show shipping time in your template, please use the following code:
<?php echo do_shortcode( '[wdts_shipping_time id="ORDER_ID"]' ); ?>
Display time picker field in other places on the checkout page
If you are a developer, also you can do that by changing the hook used in the plugin:
- Open the file
vendor/prowcplugins/wdtcore/src/Checkout.phpin the plugin - On line 23, you will see:
add_action( 'woocommerce_before_order_notes', [ $this, 'show_field' ], 20 );
- Change
woocommerce_before_order_notesto another hook to show the field in a different place. A list of hooks can be found here.
Display time picker field in other pages than checkout
To place the date picker field on another page, for example the cart page, you need to overwrite the WooCommerce template file in your theme. These are the basic steps:
- Create a folder
woocommerce/cartin your theme. You can bypass this step if your theme already has this folder. - Copy the file
templates/cart/cart-totals.phpfrom WooCommerce folder, and then paste it into thewoocommerce/cartthe folder you have just created above - Open the newly copied file, and then put the following code inside that file:
<?php echo do_shortcode( '[wdts_field]' ); ?>
Then preview in the front end. You might want to move the line to an appropriate place.
To understand about the WooCommerce template, then please read this documentation
Email
By default, the shipping time is attached to the default WooCommerce email sent to admin. But if your theme is using a custom email template, then the new template might overwrite the WooCommerce template.
To fix that, please find the filewoocommerce/emails/email-addresses.php in your theme and as well as add the following code to the place where you want the shipping time to appear:
<?php if ( $delivery_time = get_post_meta( $order->id, '_delivery_date', true ) ) : ?>
<?php
$option = wdts_option();
$label = $option['label'];
?>
<h3><?php echo $label; ?></h3>
<p class="text"><?php echo do_shortcode( "[wdts_shipping_time id='" . $order->id . "']" ); ?></p>
<? endif; ?>