

Thank you for using our Product Time Countdown for WooCommerce. In the following sections, we will show you how to set up and as well as use the plugin in the easiest way possible.
| Priorities | Values |
|---|---|
| Before a single product: notices | 10 |
| Before single product summary: sale flash | 10 |
| Product images | 20 |
| Inside single product summary: title | 5 |
| Rating | 10 |
| Price | 10 |
| Excerpt | 20 |
| Add to cart | 30 |
| Meta | 40 |
| Sharing | 50 |
Purpose
Product Time Countdown for WooCommerce plugin lets you add live time counter to any WooCommerce product. You can choose which product action should execute after time ends:
- The product set to disabled (i.e. non-purchasable or hidden).
- Product sale canceled.
- Product stock set to sold out.
- No action takes.
Installation
After download, the .zip package, unzip it and you will see a folder “product-time-countdown-for-woocommerce-pro”.
Go to Dashboard → Plugins → Add New and click Upload Plugin.
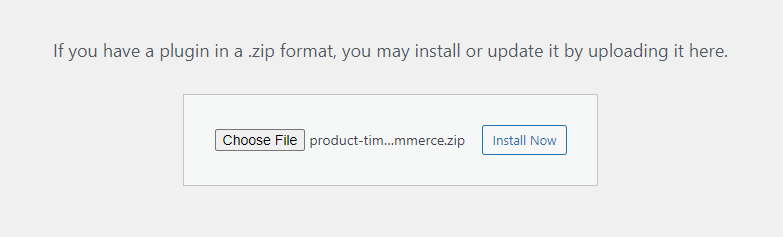
Product Time Countdown for WooCommerce – Admin Screenshot
On the next page, select the “product-time-countdown-for-woocommerce-pro” file and click Install Now.
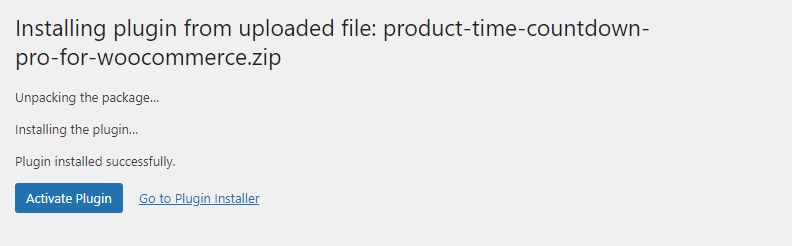
Product Time Countdown for WooCommerce – Admin Screenshot
After uploading the plugin, click Activate Nowlink to activate the plugin.
How to activate your license key
Our pro plugin come with a license key, a license which you will find in your accounts ProWC Plugins / Envato plugins purchase history.
To activate the license key for your plugin, follow these steps:
1. The Purchase key field can be found in Dashboard → PTCFWC Settings tab.
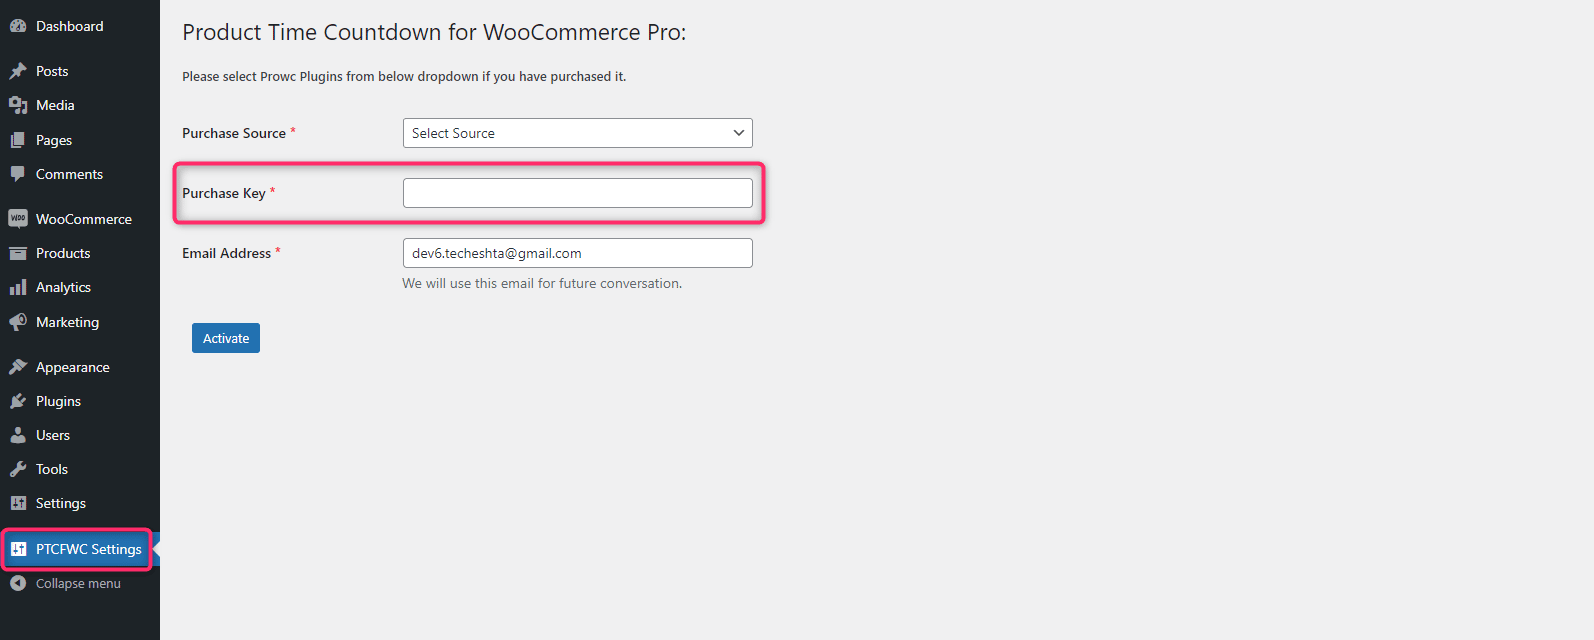
Product Time Countdown for WooCommerce – PTCPWC Settings
2. Keep your license key handy and filled the form.
- Purchase Source : Select your purchase source where you have purchase the plugin.
- Purchase Key: Insert the purchase key into the field.
- Email Address: Insert your email address.
Click Activate.
3. To make sure that your license key is properly activated, check Activate button text will be changed to Deactivate.
Settings
Now, you’ll see the plugin settings page in the WooCommerce → Settings → Product Time Countdown tab
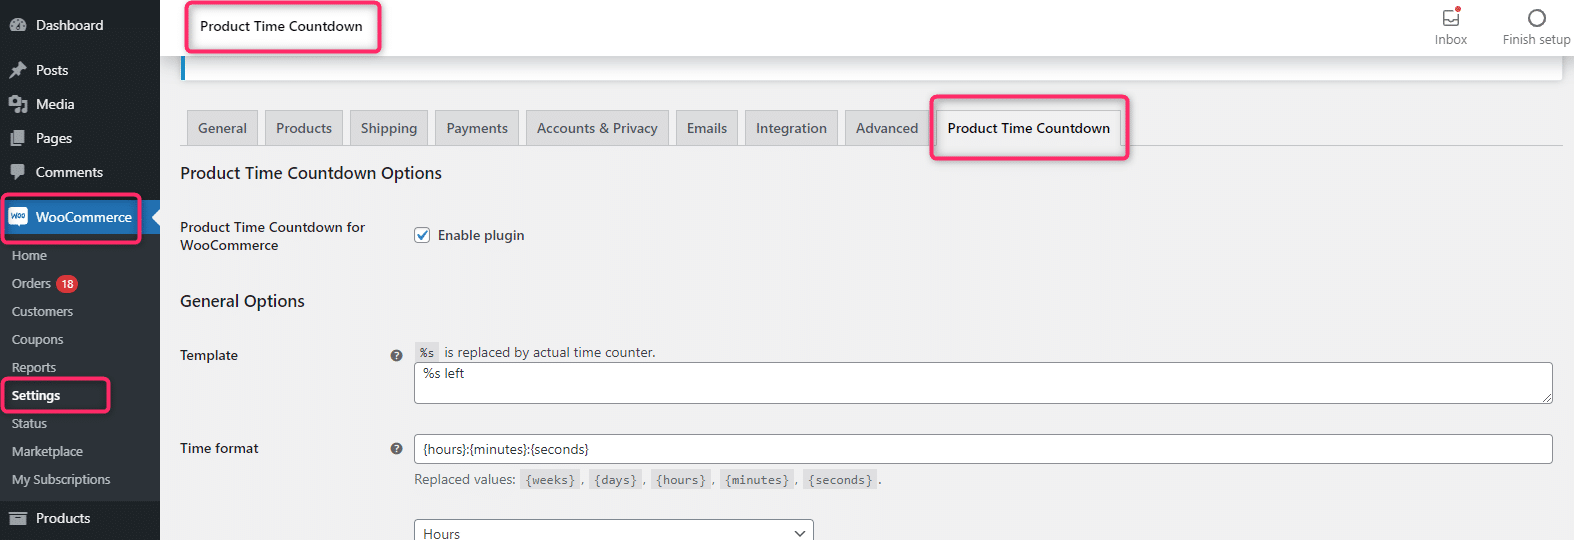
Product Time Countdown for WooCommerce Admin Settings
Upgrade
If you have an old version of the plugin, then please follow the steps below to update it to the latest version:
- Download the .zip package, unzip it and you will see a folder “product-time-countdown-for-woocommerce-pro”.
- Unzip the “product-time-countdown-for-woocommerce-pro” to get “product-time-countdown-for-woocommerce-pro.
- Upload “product-time-countdown-for-woocommerce-pro” folder to the /wp-content/plugins/ directory, overwrite old plugin files.
Configuration
Product Time Countdown Options
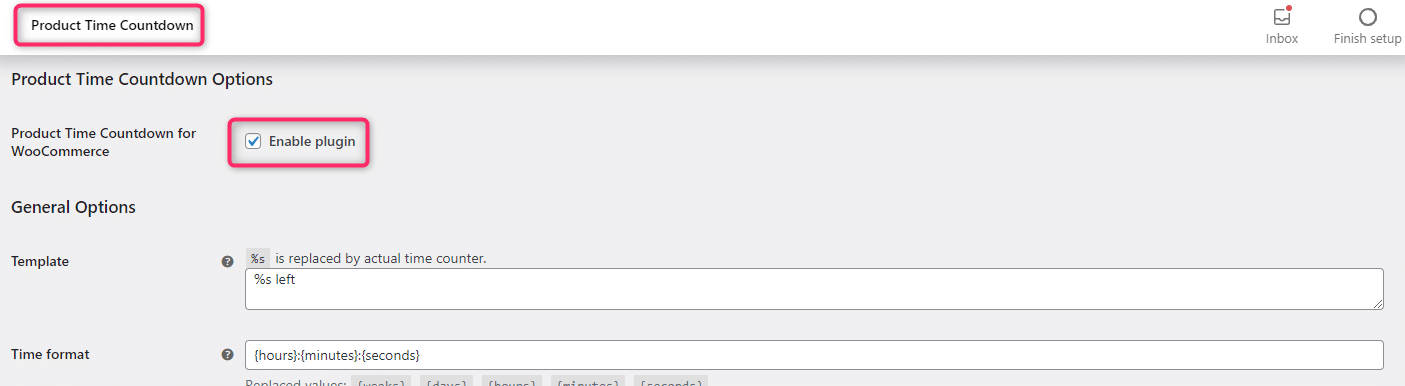
Admin Settings
Product Time Countdown for WooCommerce plugin used to enable or disable Product Time Countdown on the product edit page on WordPress admin.
Default: Checked
Output
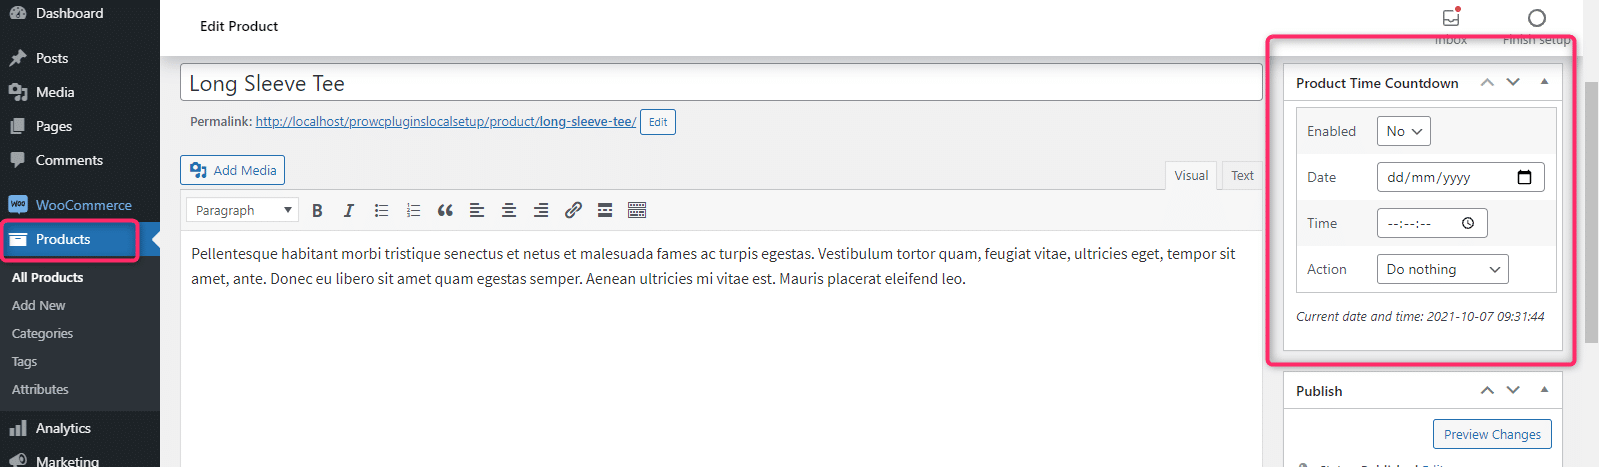
Admin Product Settings
General Options
Below is the General Options screenshot.
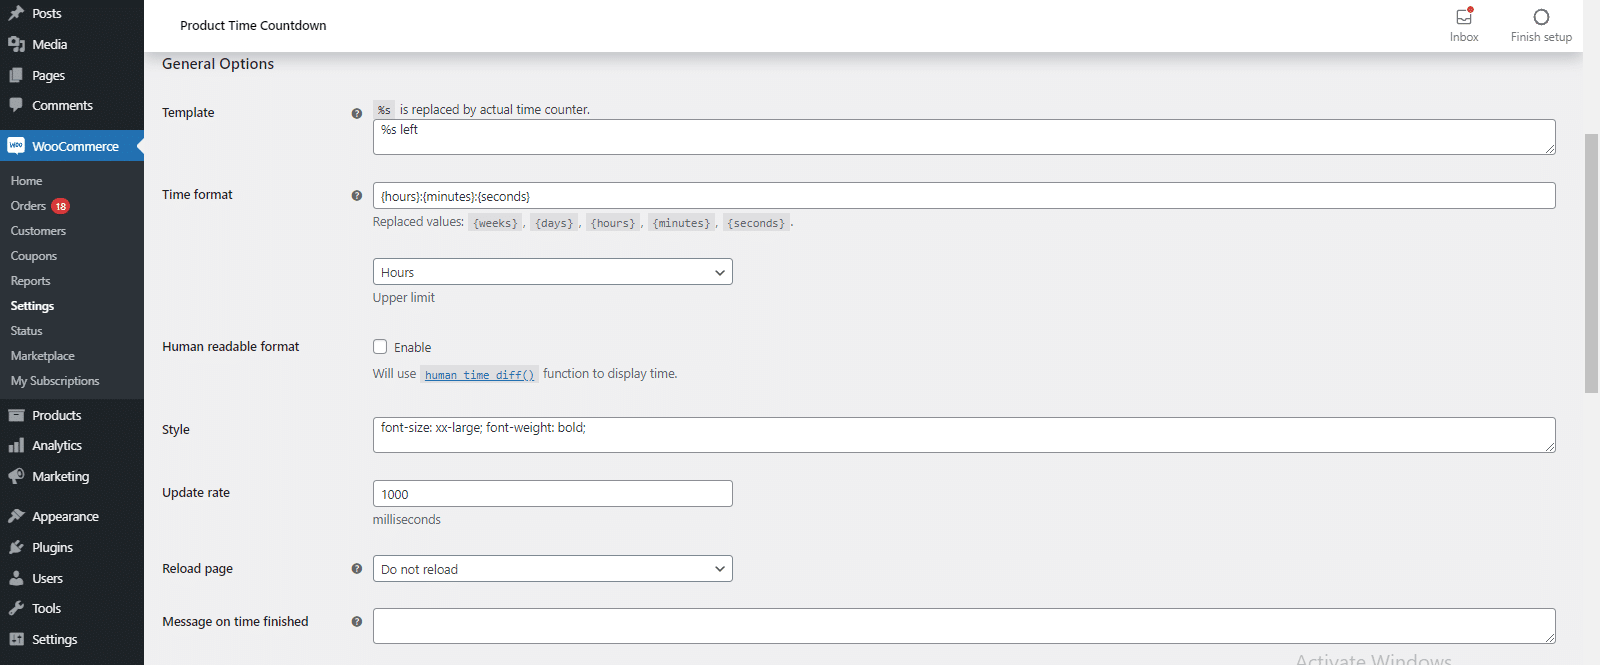
Admin General Options Settings
Output
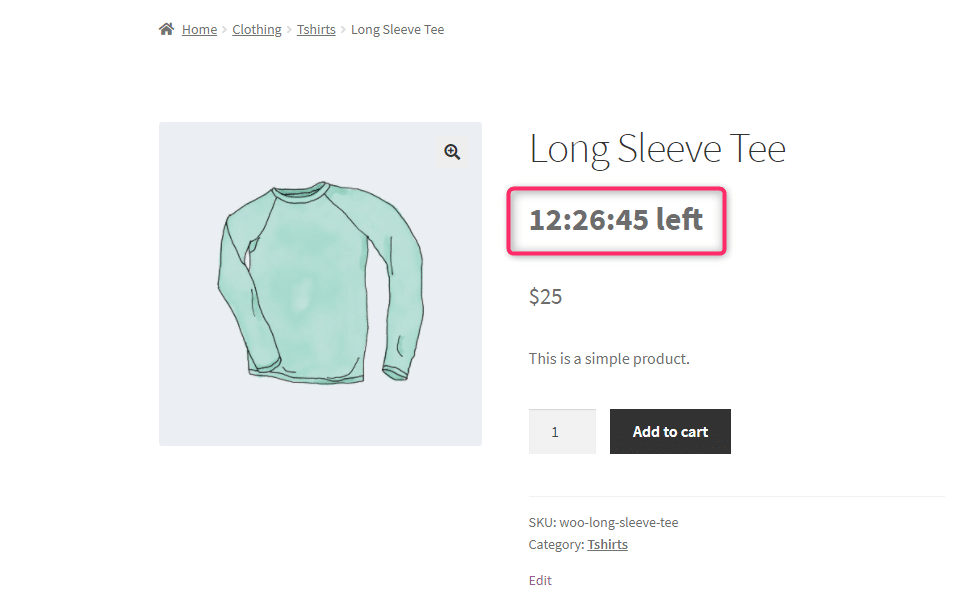
On the front-end product page:
Front-end Product Screenshot
Template: You can use HTML and shortcodes here. %s replaced by the actual time counter. You can change the “left” word to whatever you want as shown in the above screenshot.
Default: %s left
Time format: Ignored if “Human-readable format” option below is enabled. Replaced values: {hours}, {minutes}, {seconds}. You can use only hours and minutes, if the timer is longer like {hours}:{minutes}.
Default: {hours}:{minutes}:{seconds}
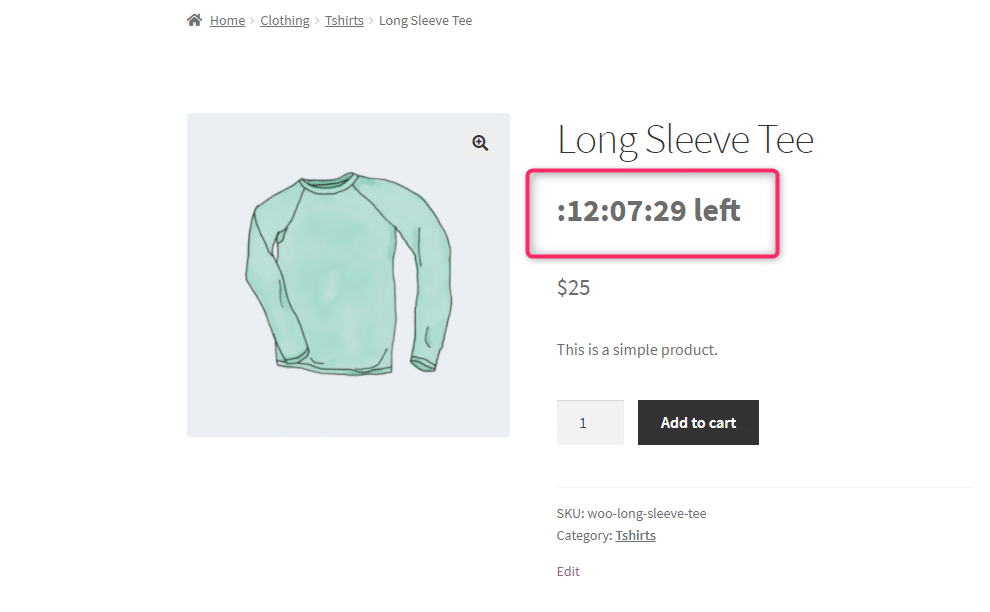
Upper limit: After that one dropdown list says that you have to set the Upper Limit. If your timer is in days then, you have to set Days in this dropdown list otherwise, it will not display correctly on the front-end product page. For example: If you set {days}:{hours}:{minutes}:{seconds} and if you forgot to set Upper Limit as Days then the output like below screenshot:
Front-end Product Screenshot
As you can see, Day’s number is not showing.
Default: Unchecked
More General Options:
Style : Time counter CSS styling. You can design the timer counter however you want by adding custom CSS here.
Default: font-size: xx-large; font-weight: bold;
Update rate: Counter update rate in milliseconds.
Default: 1000
Reload page: It will reload the page on time finished. There are three values: Reload, Reload on single product pages only and Do not reload.
Default: Do not reload
Message on time finished: Message will be visible on time finished on the front-end instead of the time counter. You can set the message whatever you want.
Default: Empty
Position options
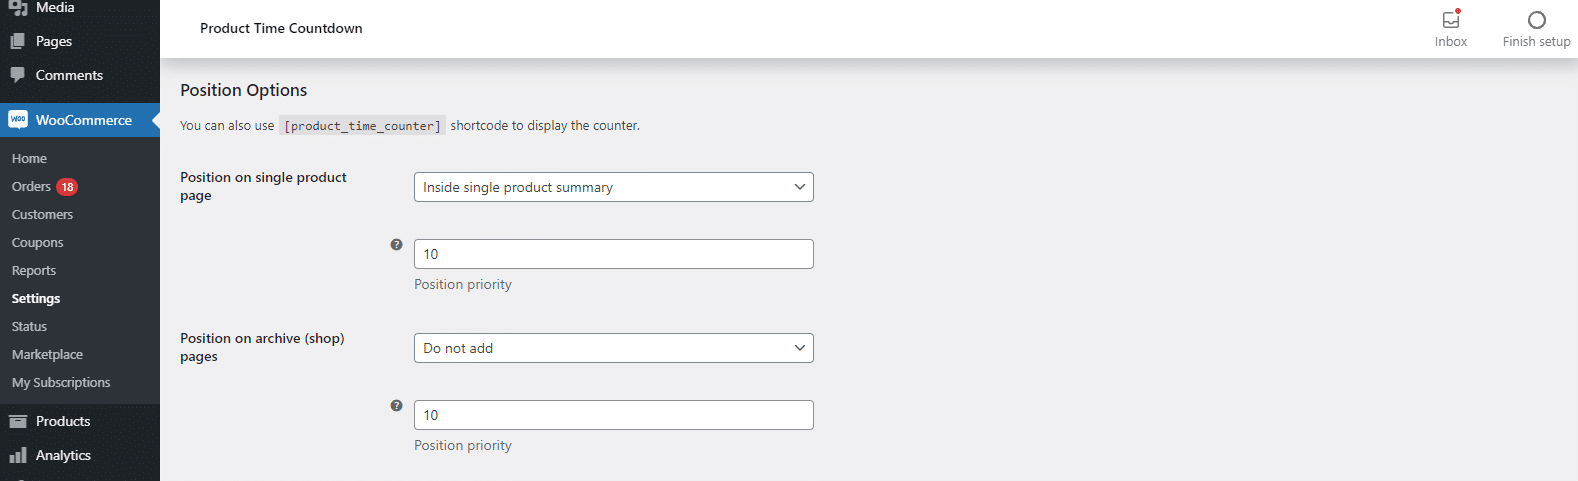
Below is the screenshot for the Position Options.
Admin Screenshot
Position options
You can set the timer wherever you want on the front-end product page at below positions:
- Do not add : Not add the timer.
- Before single product: Add timer before the product.
- Before single product summary: Add timer above the product name.
- Inside single product summary: Add timer between product name and product price.
- After single product summary: Add timer below the product image.
- After single product: Add timer after the product.
- Before add to cart form: Add timer before adding to cart form.
- Before add to cart button: Add timer between the quantity box and add to the cart button.
- After add to cart button: Add timer after adding to the cart button.
- After add to cart form: Add timer after adding to the cart button.
Default: Inside single product summary
Position priority (Single product page):
Default: Inside single product summary
| Priorities | Values |
|---|---|
| Before a single product: notices | 10 |
| Before single product summary: sale flash | 10 |
| Product images | 20 |
| Inside single product summary: title | 5 |
| Rating | 10 |
| Price | 10 |
| Excerpt | 20 |
| Add to cart | 30 |
| Meta | 40 |
| Sharing | 50 |
Default: 10
Position on archive (shop) pages: It will display the timer on the Archive (Shop) page. i.e. On the product listing page. There are several values below:
- Do not add: Not add the timer.
- Before product: Add the timer before the product.
- Before product title: Add the timer before the product title.
- Inside product title: Add the timer between the product title and product image.
- After product title: Add the timer after the product title.
- After product: Add the timer above the add to cart button.
Default: Do not add
Position priority (Archive pages): Change this if you want to move the timer inside the Position.
Default: 10
“Disable product” action options
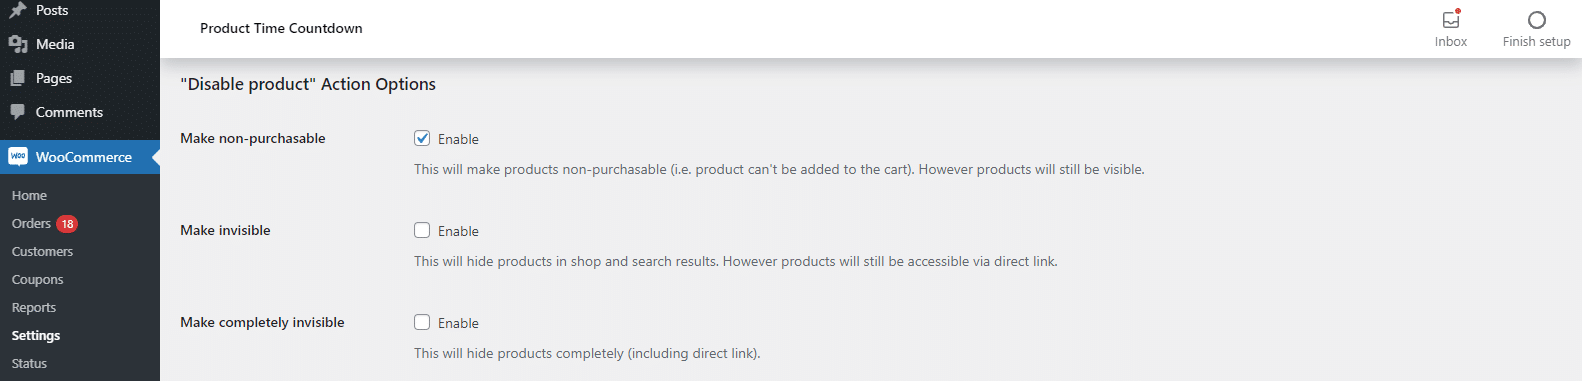
Below is the screenshot for the “Disable product” Action Options.
Admin Screenshot
Make non-purchasable: This will make products non-purchasable (i.e. product can’t be added to the cart). However, products will still be visible.
Default: Unchecked
Make invisible: This will hide products in a shop, and as well as search results. However, products will still be accessible via direct link.
Default: Unchecked
Make completely invisible: This will hide products completely (including a direct link).
Default: Unchecked
Admin Products List Options
Below is the screenshot for Admin Products Lists Options.
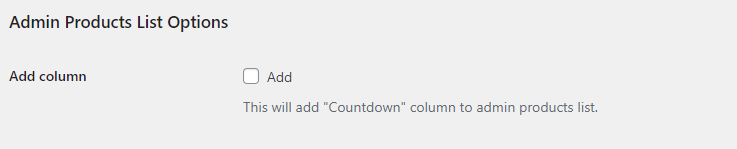
Admin Screenshot
Add column: This will add the “Countdown” column to the admin products list.
Default: Unchecked
Output:
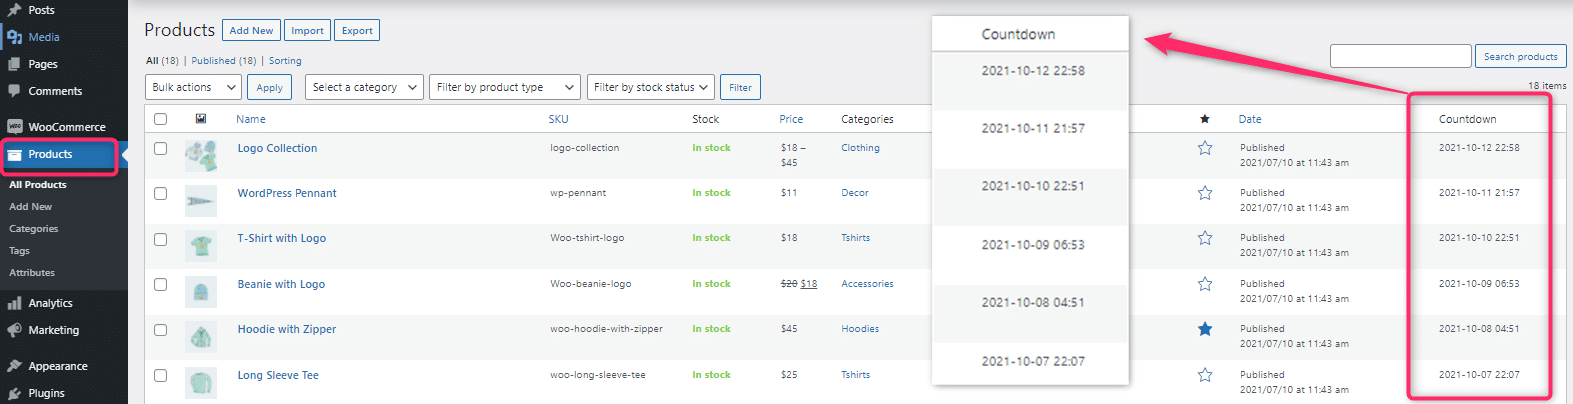
Admin Product Listing Page
Per product settings
After reviewing the general options, as described above, please visit some product’s admin edit page (i.e. for each product separately). See the below screenshot:
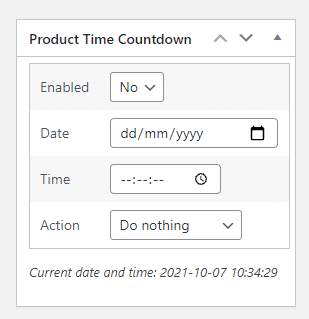
Admin Per product settings
In “Product Time Countdown” meta box you will be able to:
- Enable or Disable the counter.
- Set Date and Time.
- Set action on time end: Do nothing, Disable product, Cancel sale, and as well as Make sold out.
Consider below example:
Example
The screenshot below demonstrates how would time counter look on the frontend (single product page) if you would set Template option to:
Sale ends in %s
Style option to:
font-size: large; color: white; background-color: #ff9800; padding: 15px;
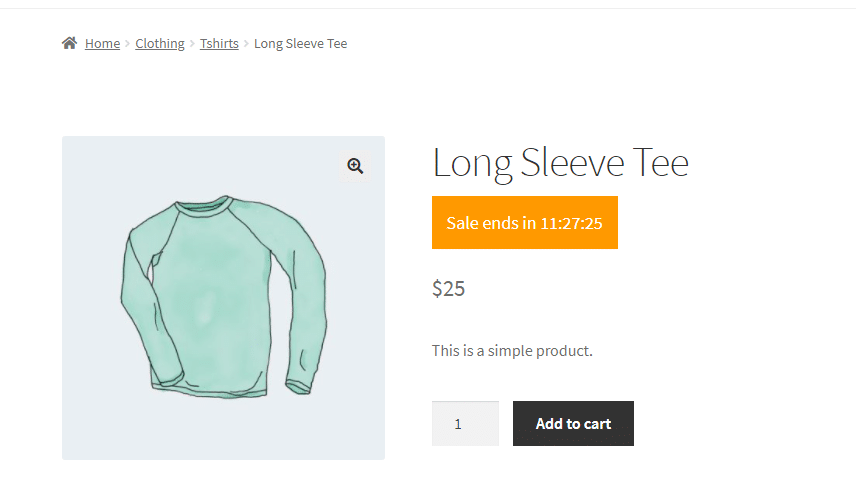
Front-end Product Screenshot
Reset Settings
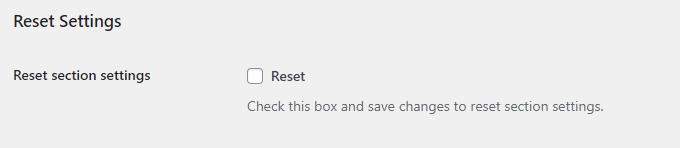
Below is the screenshot for Reset Settings.
Admin Screenshot
Reset section settings: Check this box, and as well as save changes to reset section settings.
Default: Unchecked