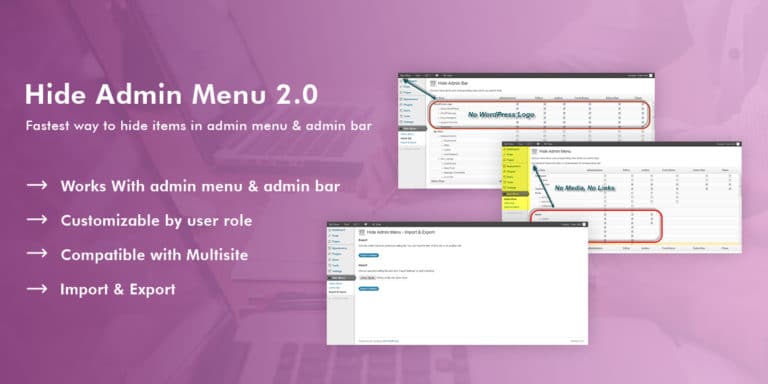
Thank you for using our Hide Admin Menu plugin. In the following sections, we will show you how to set up and use the plugin in the easiest way possible.
Purpose
Hide Admin Menu plugin lets you hide the admin bar and admin menu bar items from the WordPress admin area based on the user role. Just select the checkboxes corresponding to menu items and user role and then click the Save Settings button.
You will have a simplified menu for your clients or users. That will help you hide some important menu items that you do not want them to access, like settings page, account detail page, etc.
This plugin has a very user-friendly interface and very easy to use. Everything is very simple and you can understand the whole functionality within 5 minutes!
Installation
After download, the .zip package, unzip it and you will see a folder “hide-admin-menu”.
Go to Dashboard → Plugins → Add New and click Upload Plugin.

Hide Admin Menu - Admin Screenshot
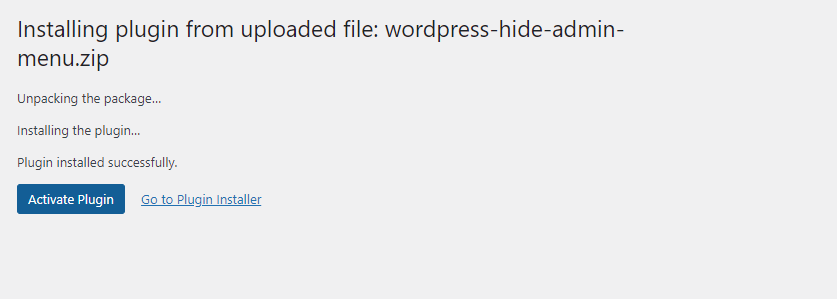
On the next page, select the “hide-admin-menu” .zip file and click Install Now.
Admin Screenshot
After uploading the plugin, click Activate Nowlink to activate the plugin.
Upgrade
If you have an old version of the plugin, please follow the steps below to update it to the latest version:
- Download the .zip package, unzip it and you will see a folder “hide-admin-menu”.
- Unzip the “hide-admin-menu” to get “hide-admin-menu” folder.
- Upload “hide-admin-menu” folder to the /wp-content/plugins/ directory, overwrite old plugin files.
Features
- Ability to hide items in the admin menu and admin bar.
- It’s customizable by the user role, including the Administrator. It works with custom user roles.
- It is compatible with Multisite.
- Ability to export and import settings.
- Auto-update supported.
Configuration
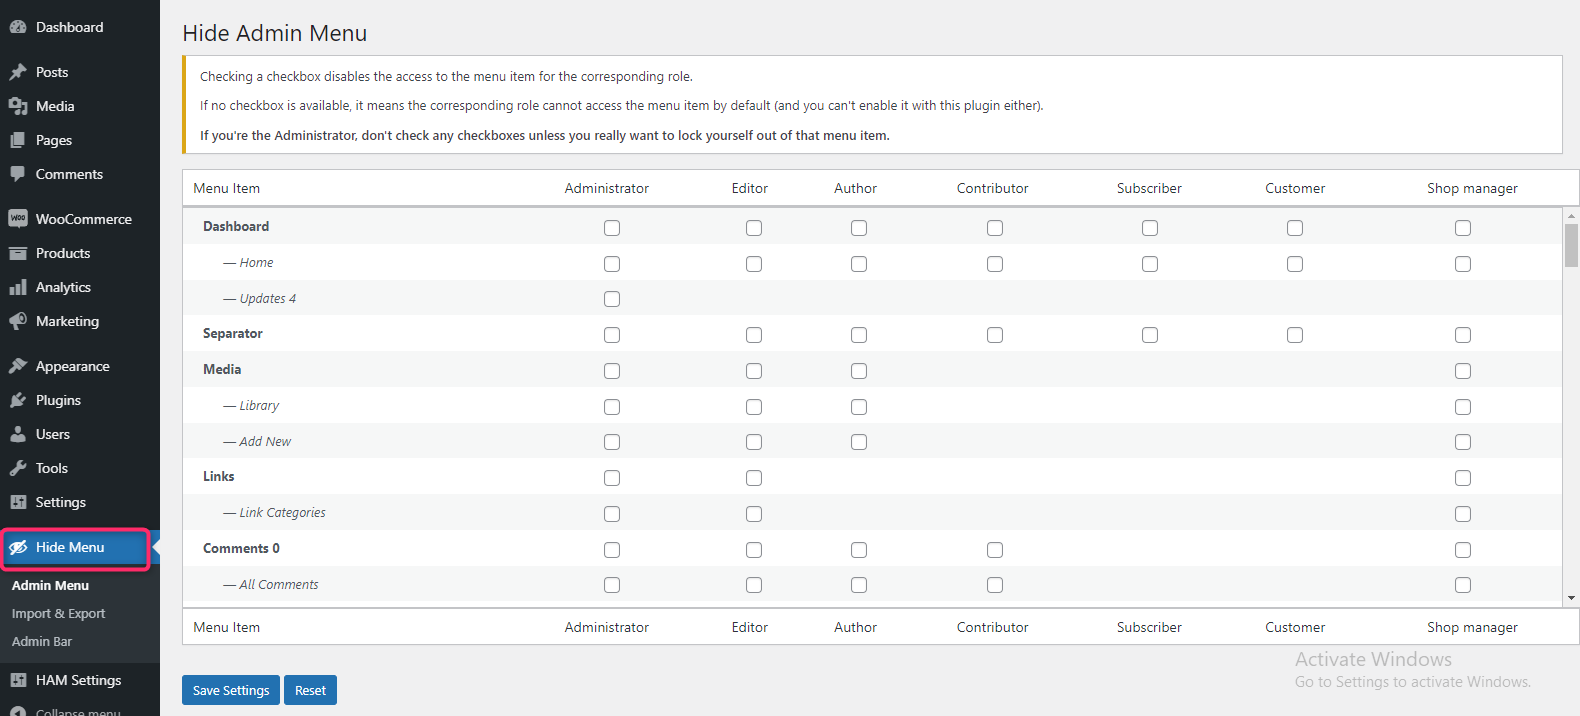
Admin Menu:
Below screenshot shows the user interface of Admin Menu:
Admin Screenshot
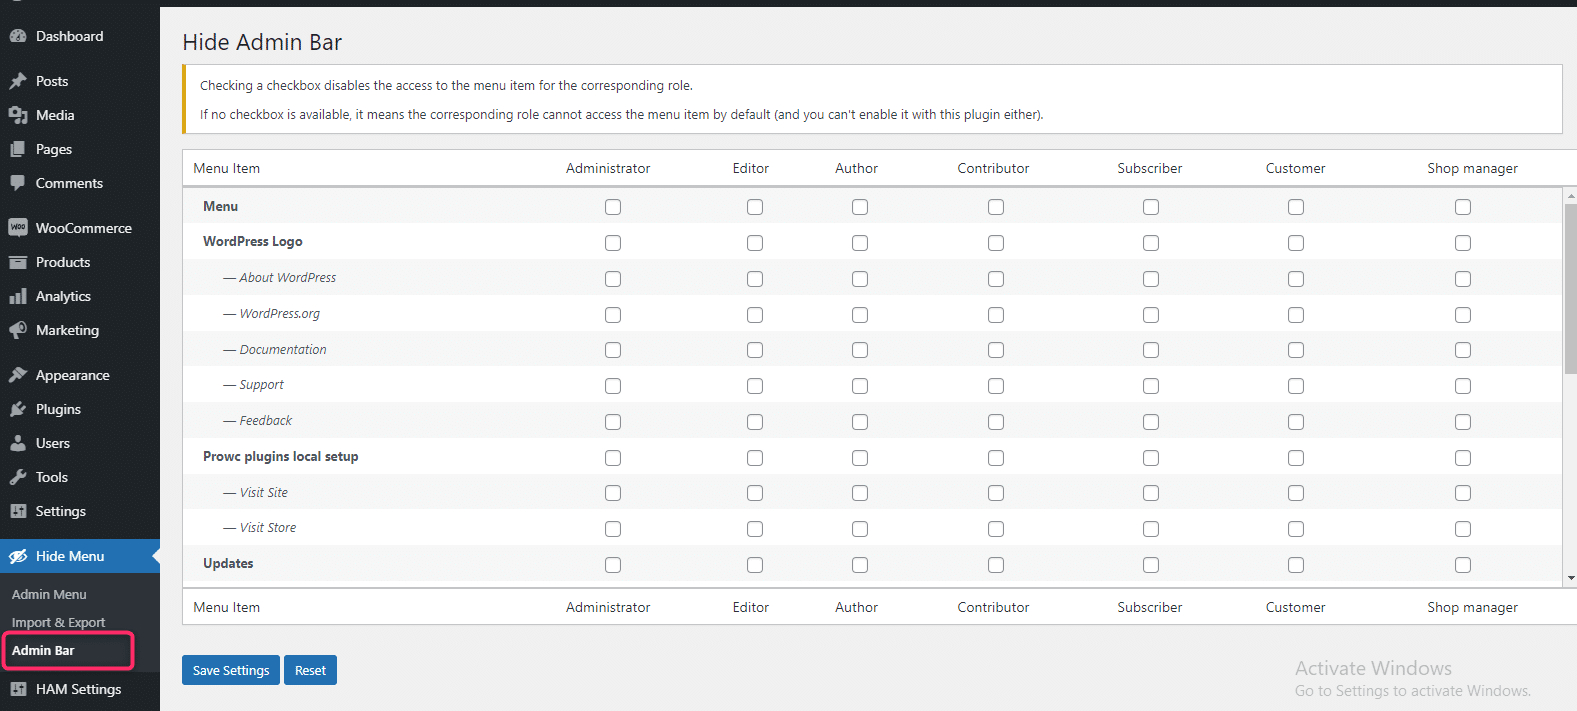
Admin Bar:
Below screenshot shows the user interface of the Admin Bar:
Admin Screenshot
Things to keep in mind:
- Checking a checkbox disables the access to the menu item for the corresponding role.
- If no checkbox is available, it means the corresponding role cannot access the menu item by default (and you can’t enable it with this plugin either).
- If you’re the Administrator, don’t check any checkboxes unless you want to lock yourself out of that menu item.
To understand more, please consider the below examples:
1. Hiding the parent item (Admin Menu):
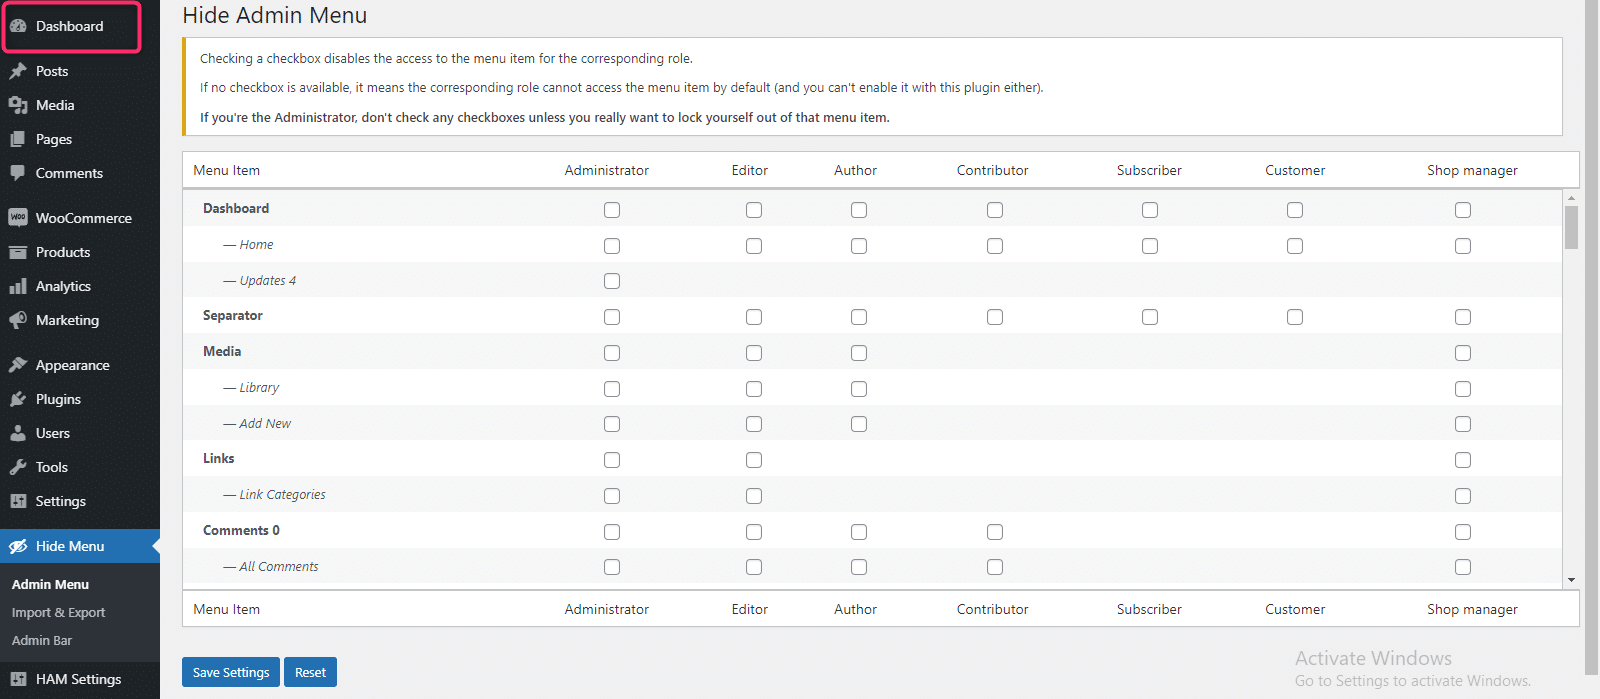
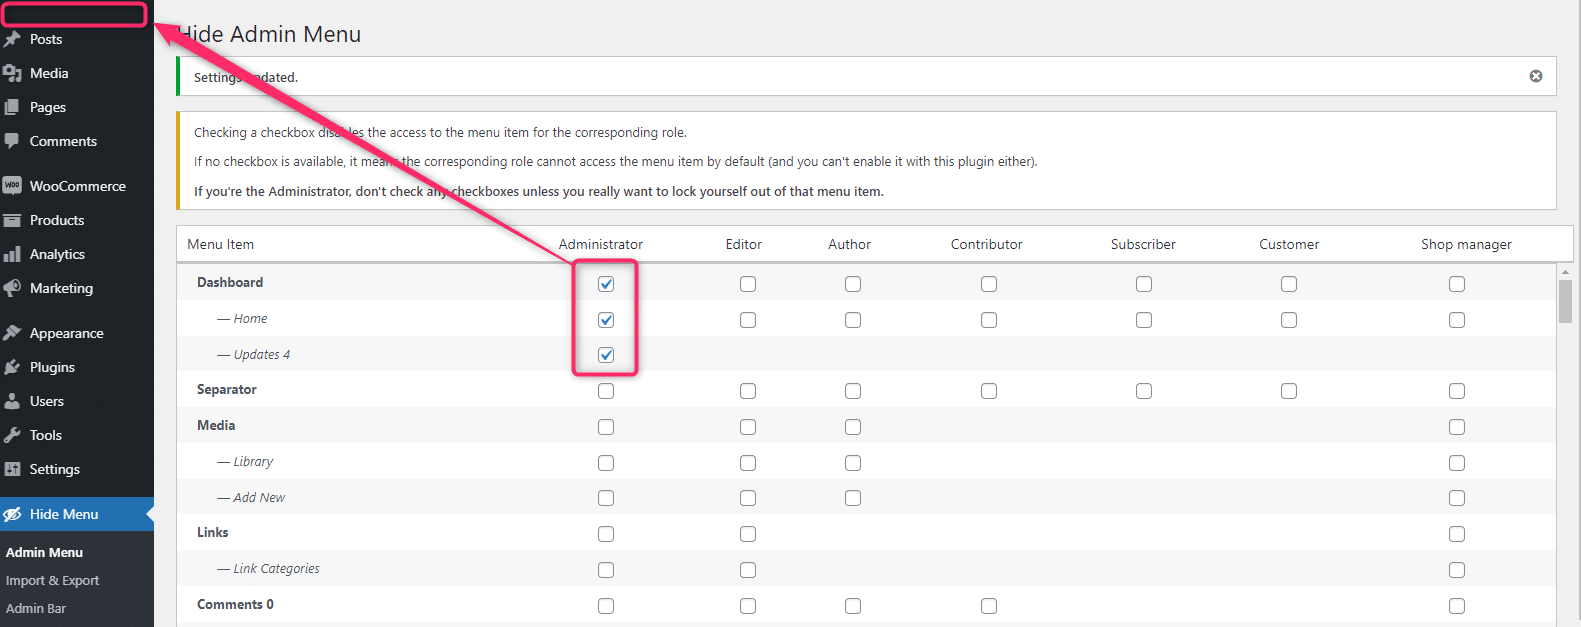
In this example, we will hide the Dashboard from the admin area by checking the marked checkbox in the above screenshot. See the below screenshot.
Before hiding
Admin Screenshot
As you can see, the Dashboard menu exists.
After hiding
Admin Screenshot
Here, you can see the Dashboard menu is no longer exists.
One another thing you might have noticed that when you have checked the Dashboard checkbox next two checkboxes (– Home and — Updates 0) were automatically being checked. That is because — Home and — Updates 0 checkboxes are the child items of the Dashboard.
Child item checkboxes will automatically check if you checked their parent item checkbox.
Here, you can hide the child items as well.
2. Hiding child items (Admin Menu):
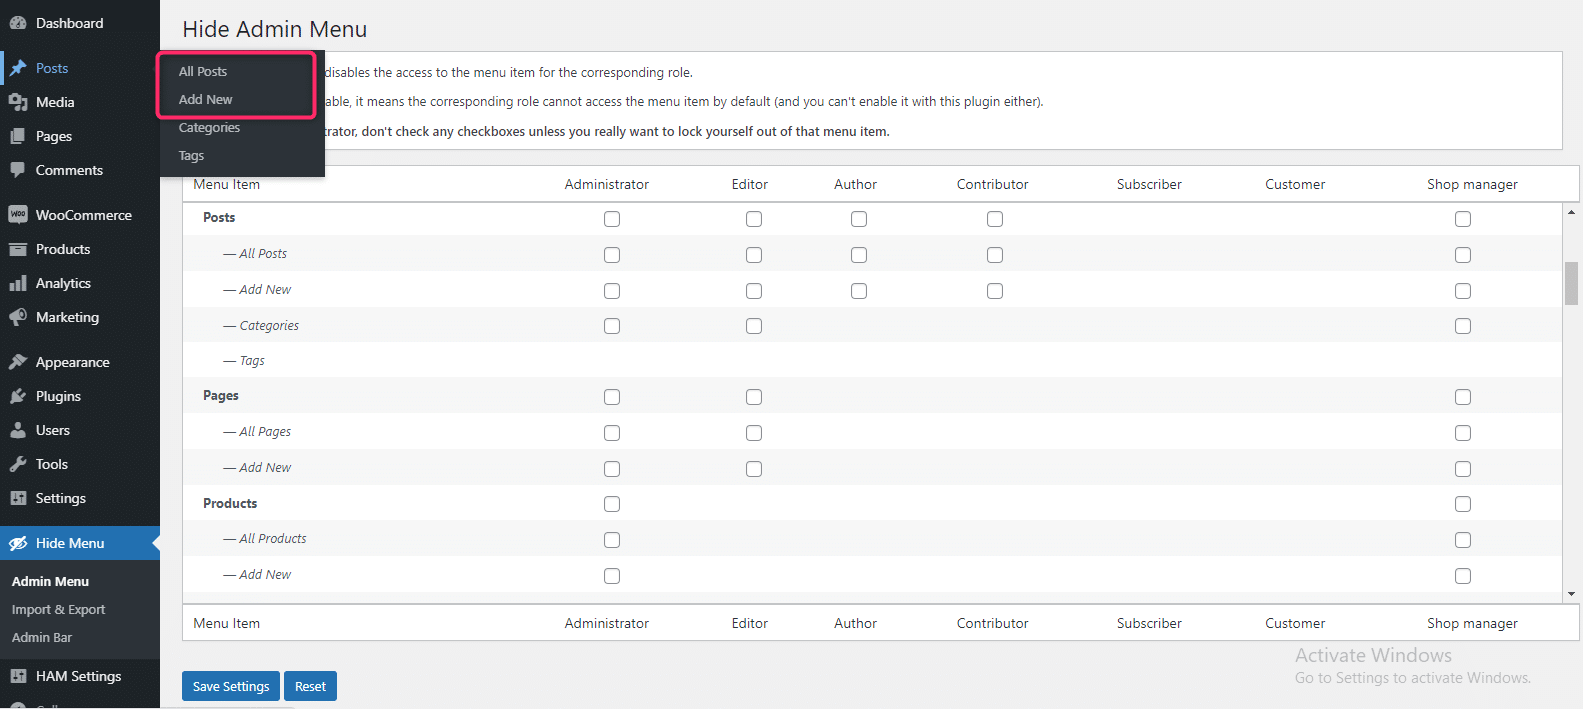
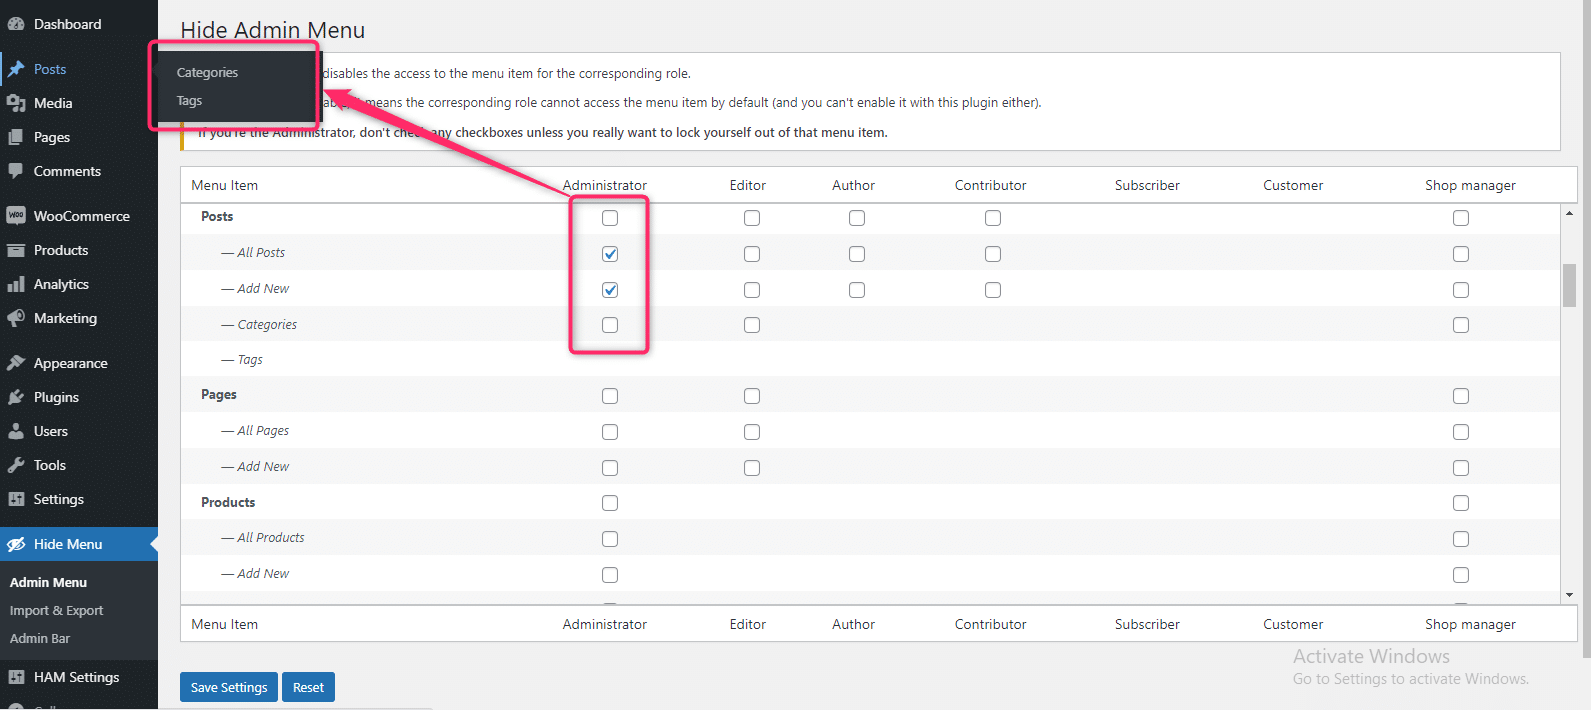
In this example, we are going to hide the All Posts and Add New child items from Posts parent item:
Before hiding
Admin Screenshot
As you can see, All Posts and Add New child items exist.
After hiding
Admin Screenshot
So, here you can see All Posts and Add New child items are no longer exists.
3. Hiding WordPress Logo (Admin Bar):
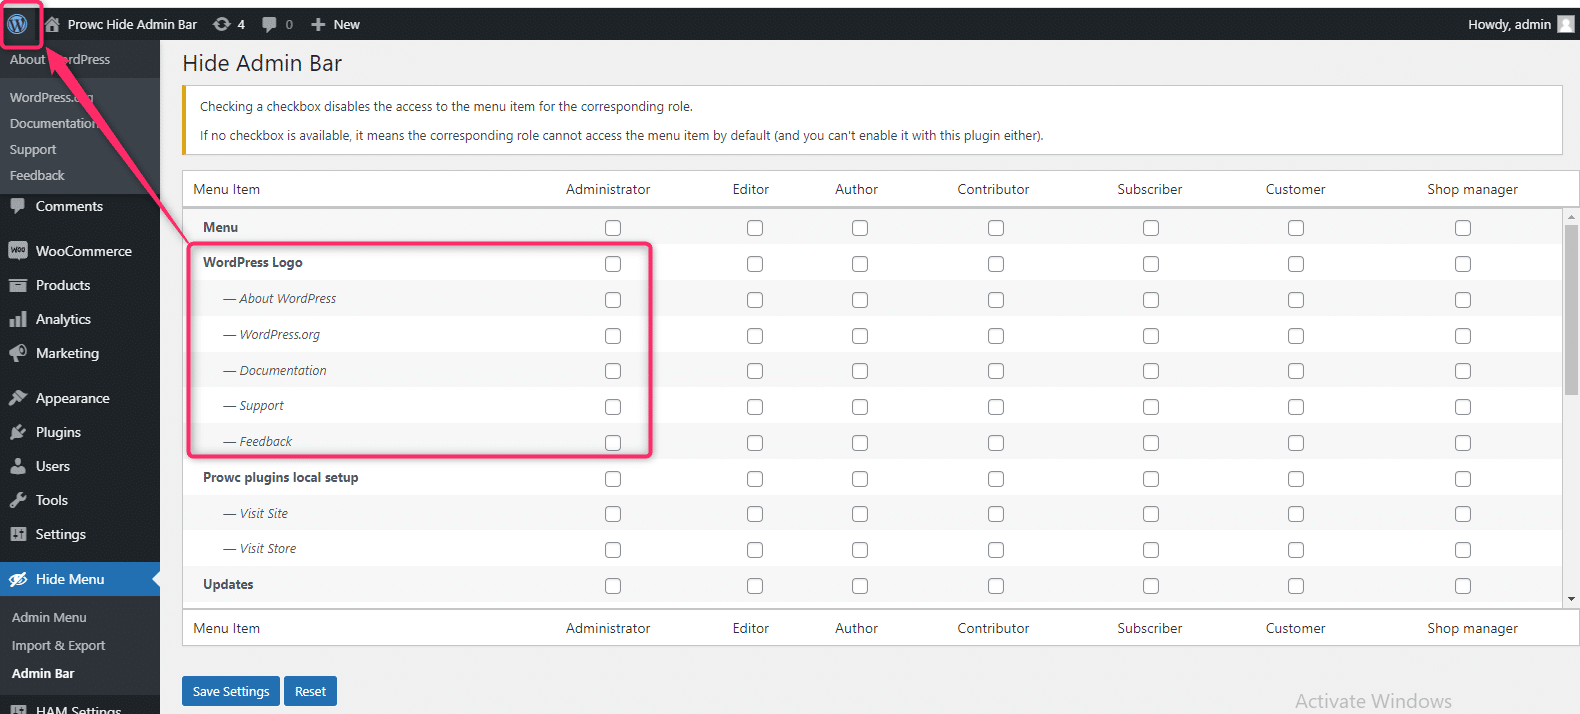
In this example, we are going to hide the WordPress Logo:
Before Hiding
Admin Screenshot
As you can see in the screenshot, there are child items with WordPress Logo as well.
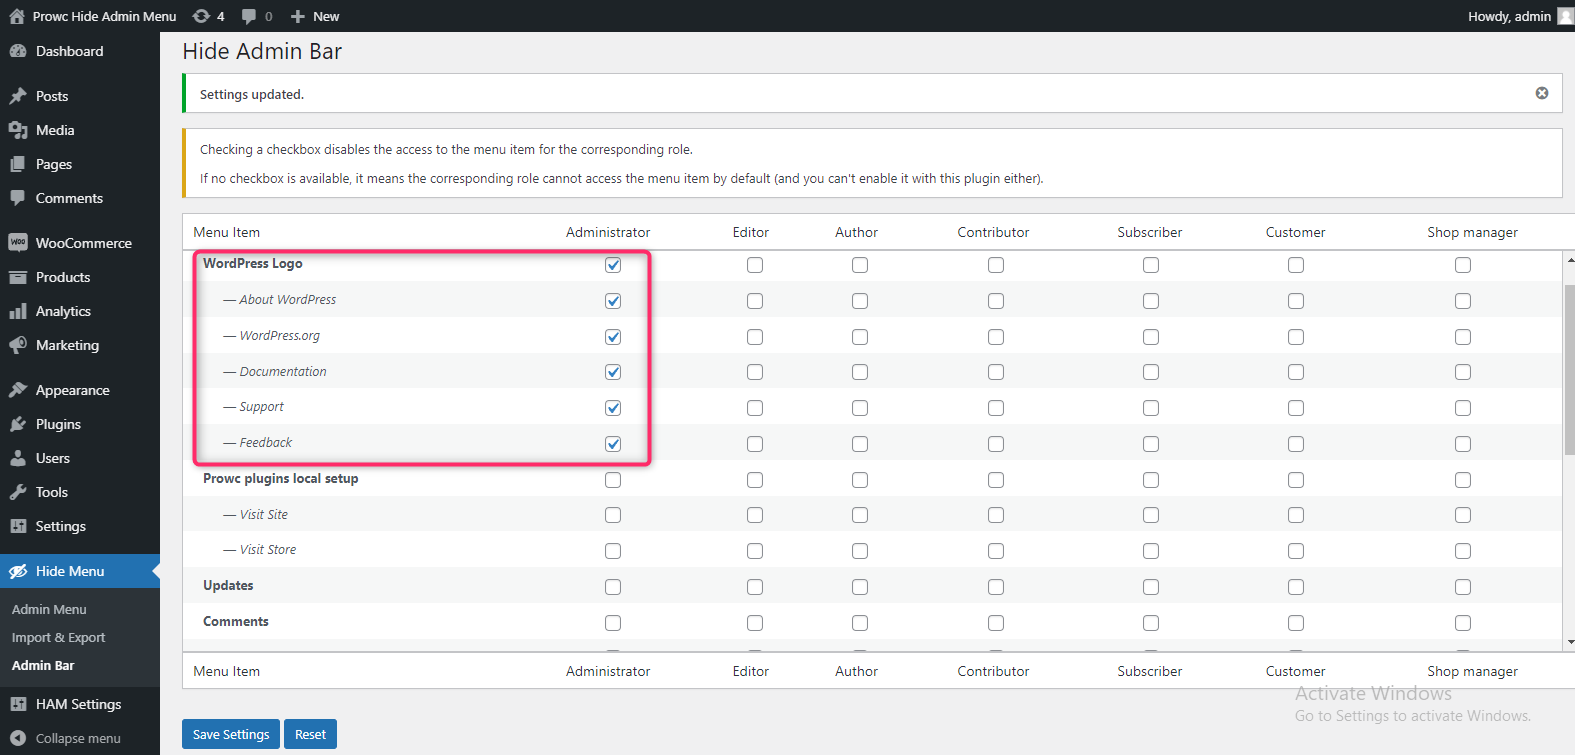
As we have seen above, if we hide parent item the child items will be hidden automatically.
After Hiding
Admin Screenshot
As you can see in the screenshot, there is no longer WordPress Logo that exists.
There are two buttons at the end of the page named Reset and Save Settings.
The Reset button is used to resets all the checkbox values to its initial values.
Save Settings button is used to save the hide or show admin menu items.
